> ## Documentation Index
> Fetch the complete documentation index at: https://mintlify-han-update-changelogs.mintlify.site/llms.txt
> Use this file to discover all available pages before exploring further.
# Route 53 and Cloudfront
> Host documentation at a /docs subdirectory using AWS services
export const platform_0 = "AWS Services"
**Prerequisite**: Your primary domain (company.com) is hosted on {platform_0}
and you are on the [Mintlify Pro plan or above](https://mintlify.com/pricing).
## Create Cloudfront Distribution
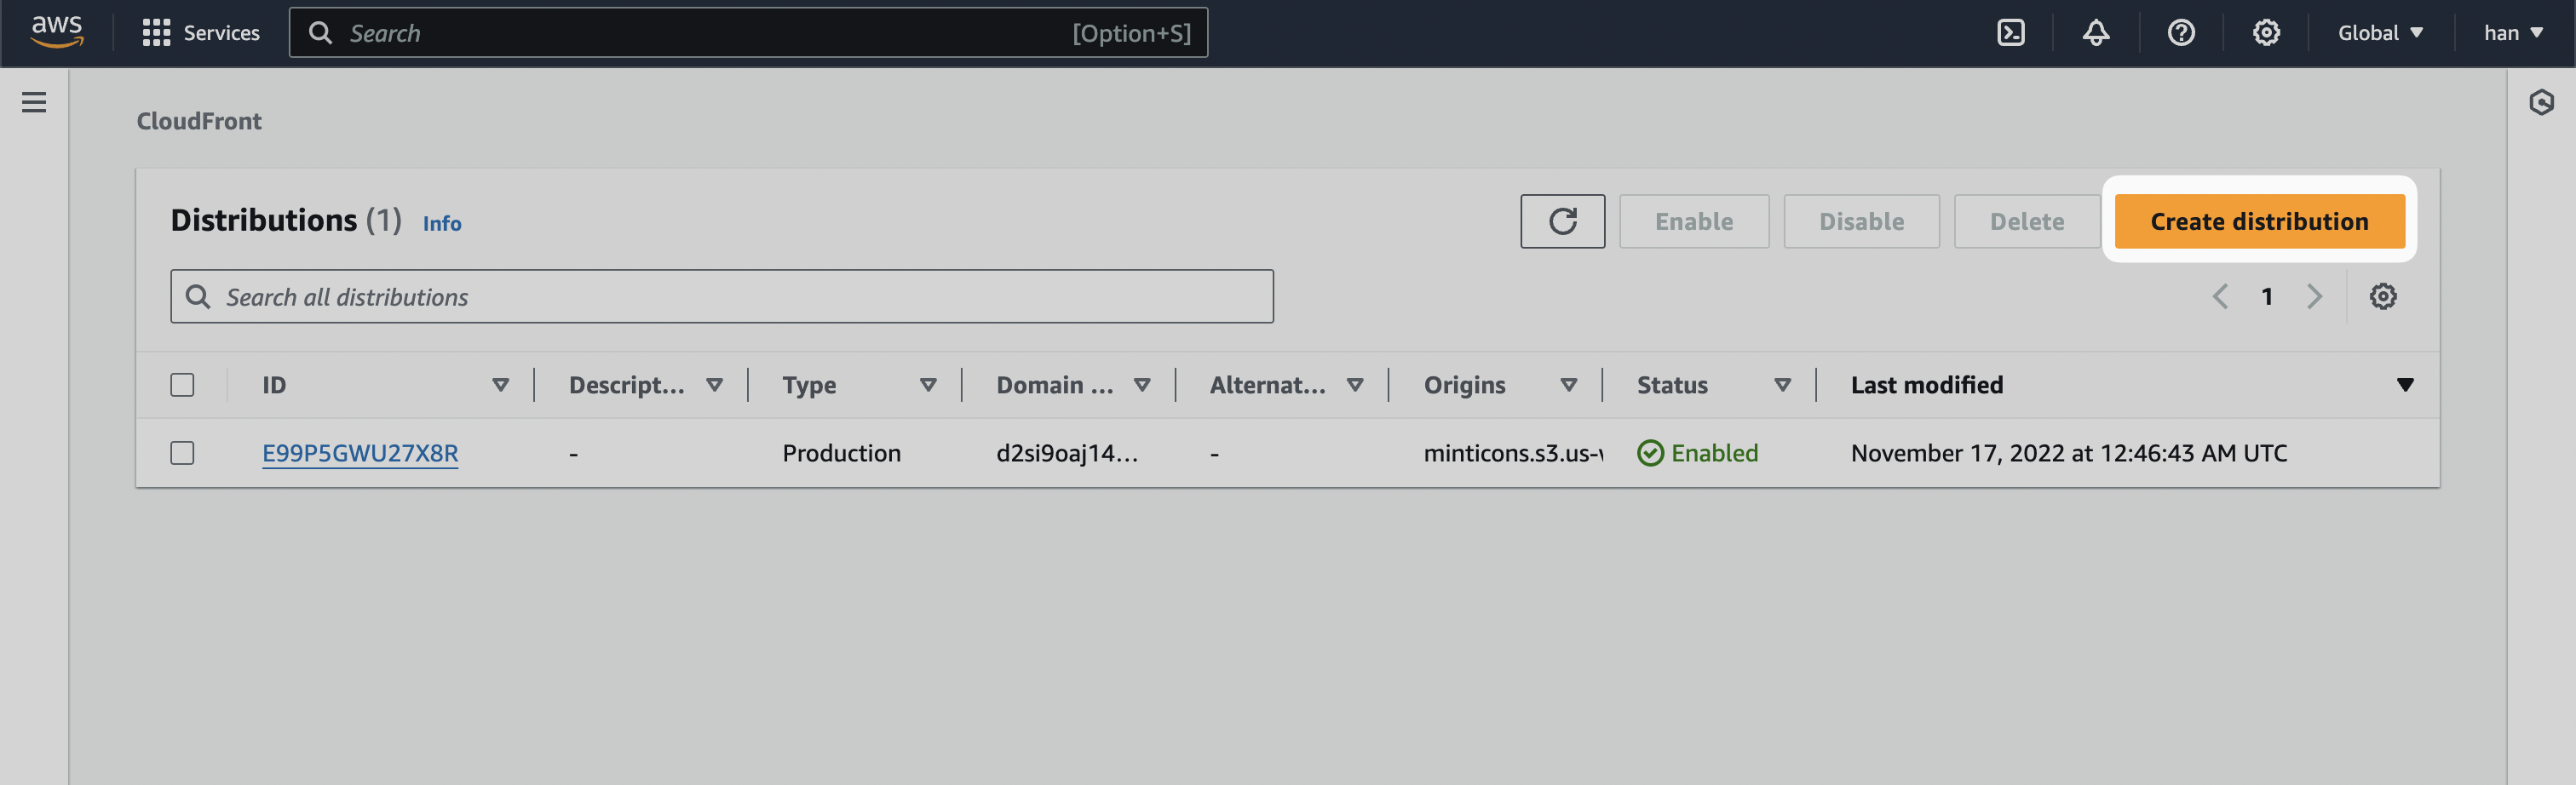
Navigate to [Cloudfront](https://aws.amazon.com/cloudfront) inside the AWS console and click on `Create distribution`
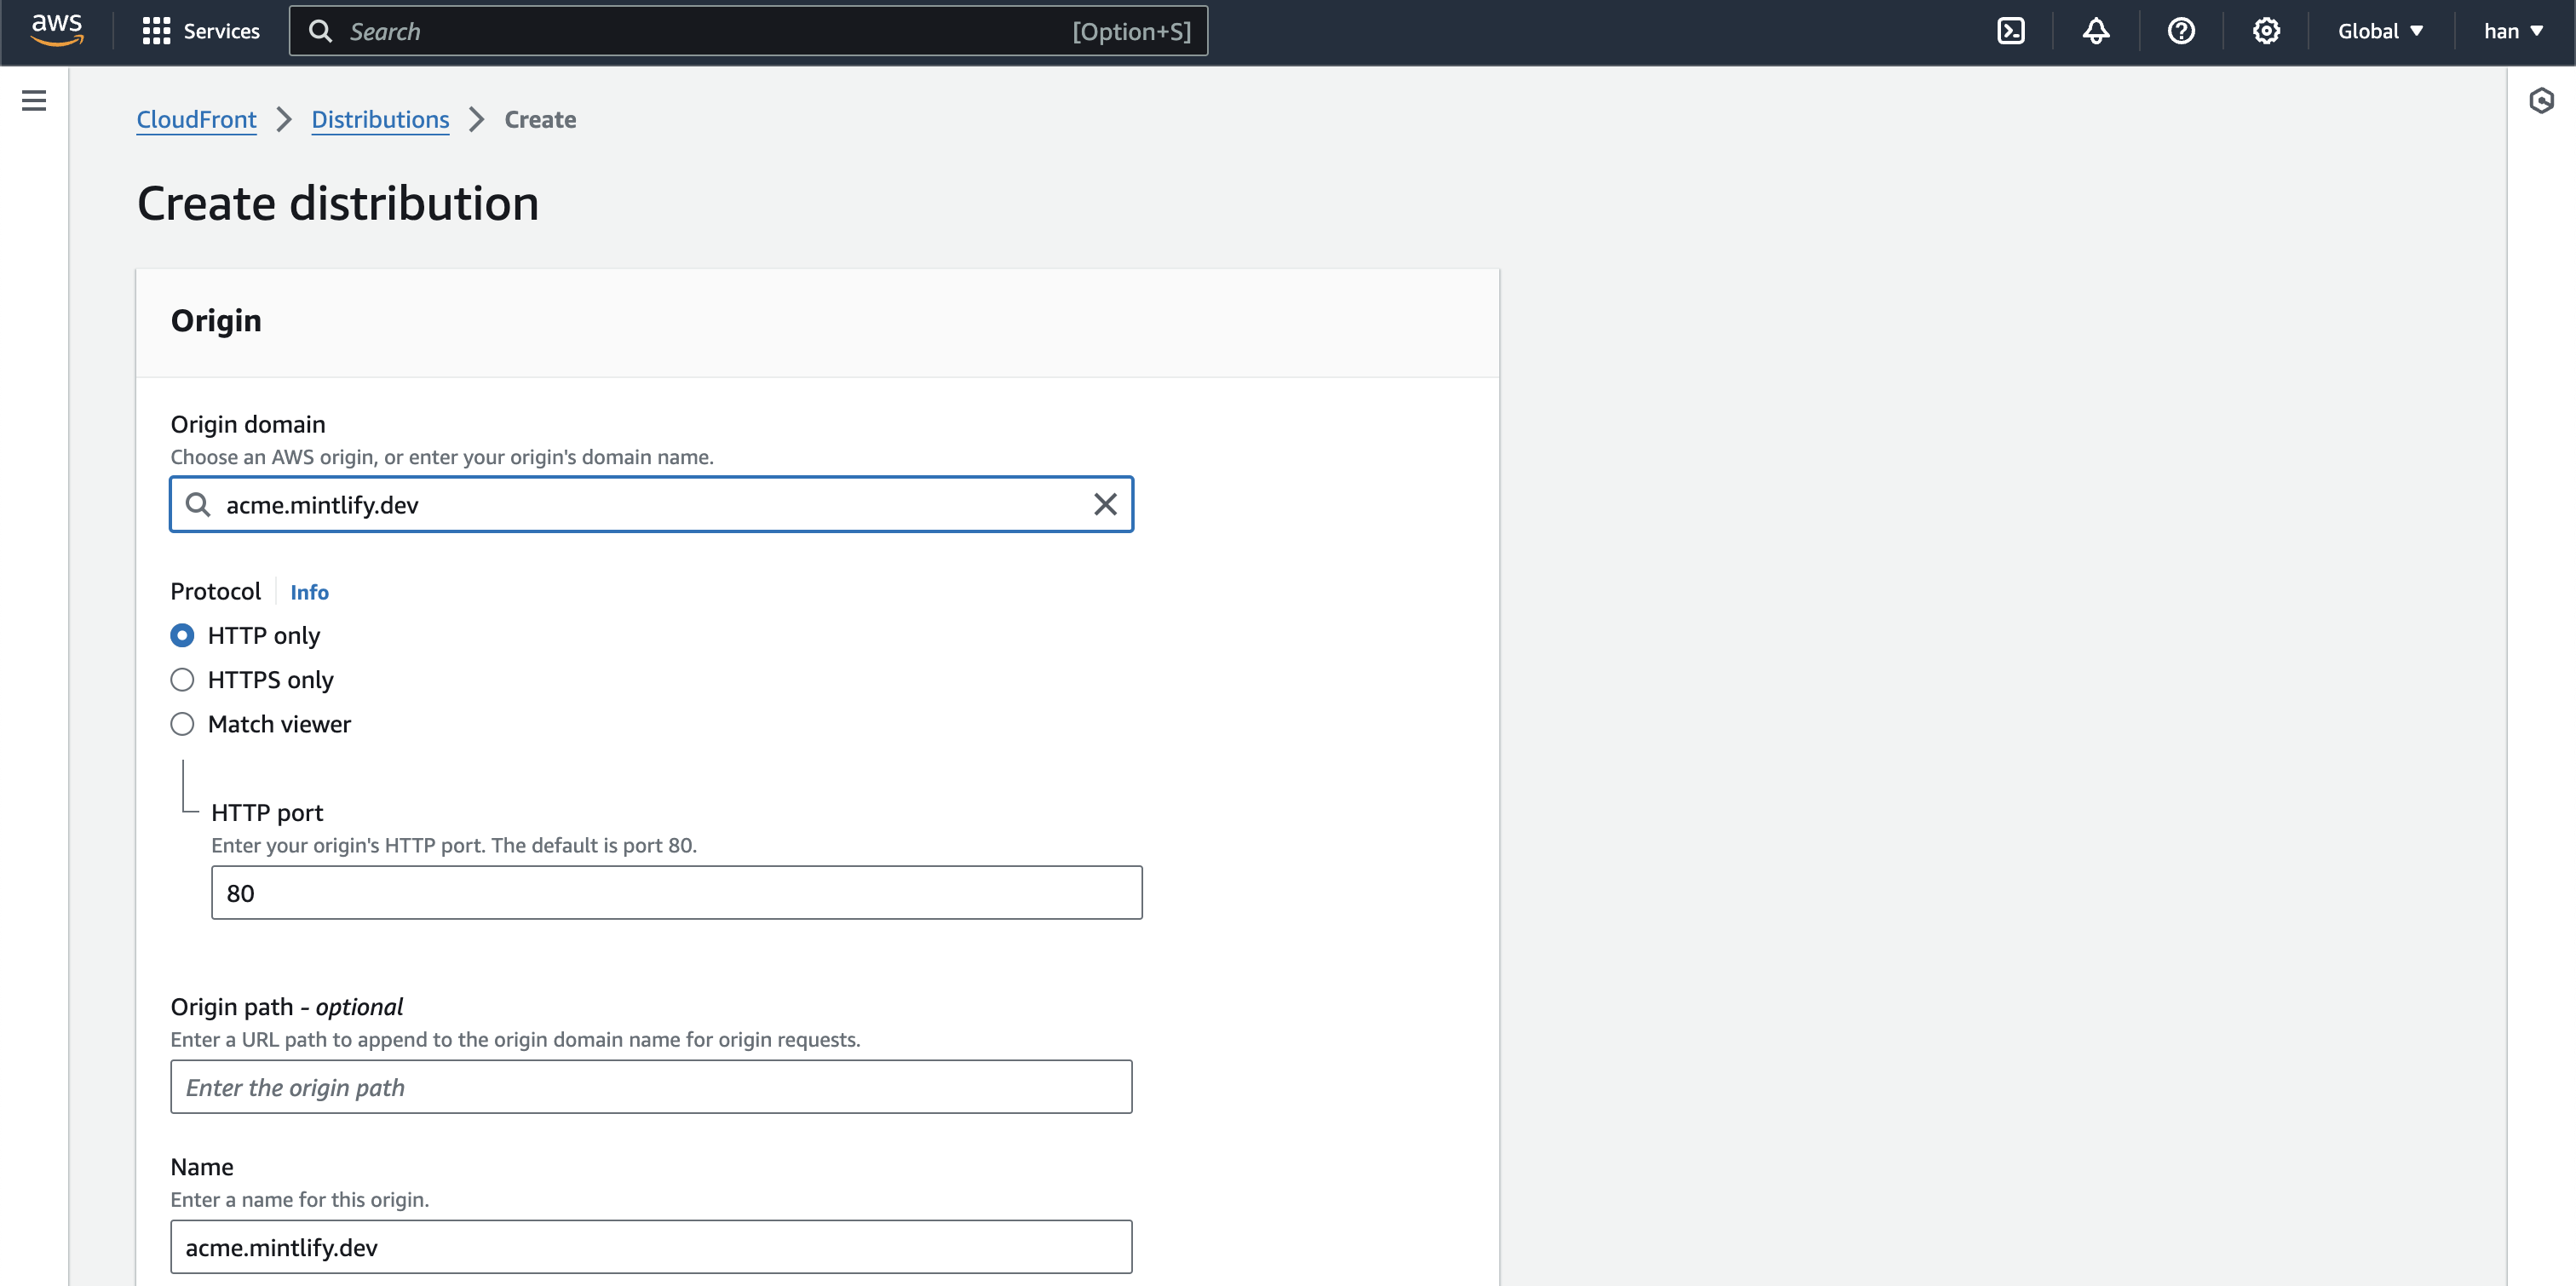
For the Origin domain, input `[SUBDOMAIN].mintlify.dev` where `[SUBDOMAIN]` is the project's unique subdomain. Click on `Use: [SUBDOMAIN].mintlify.dev`
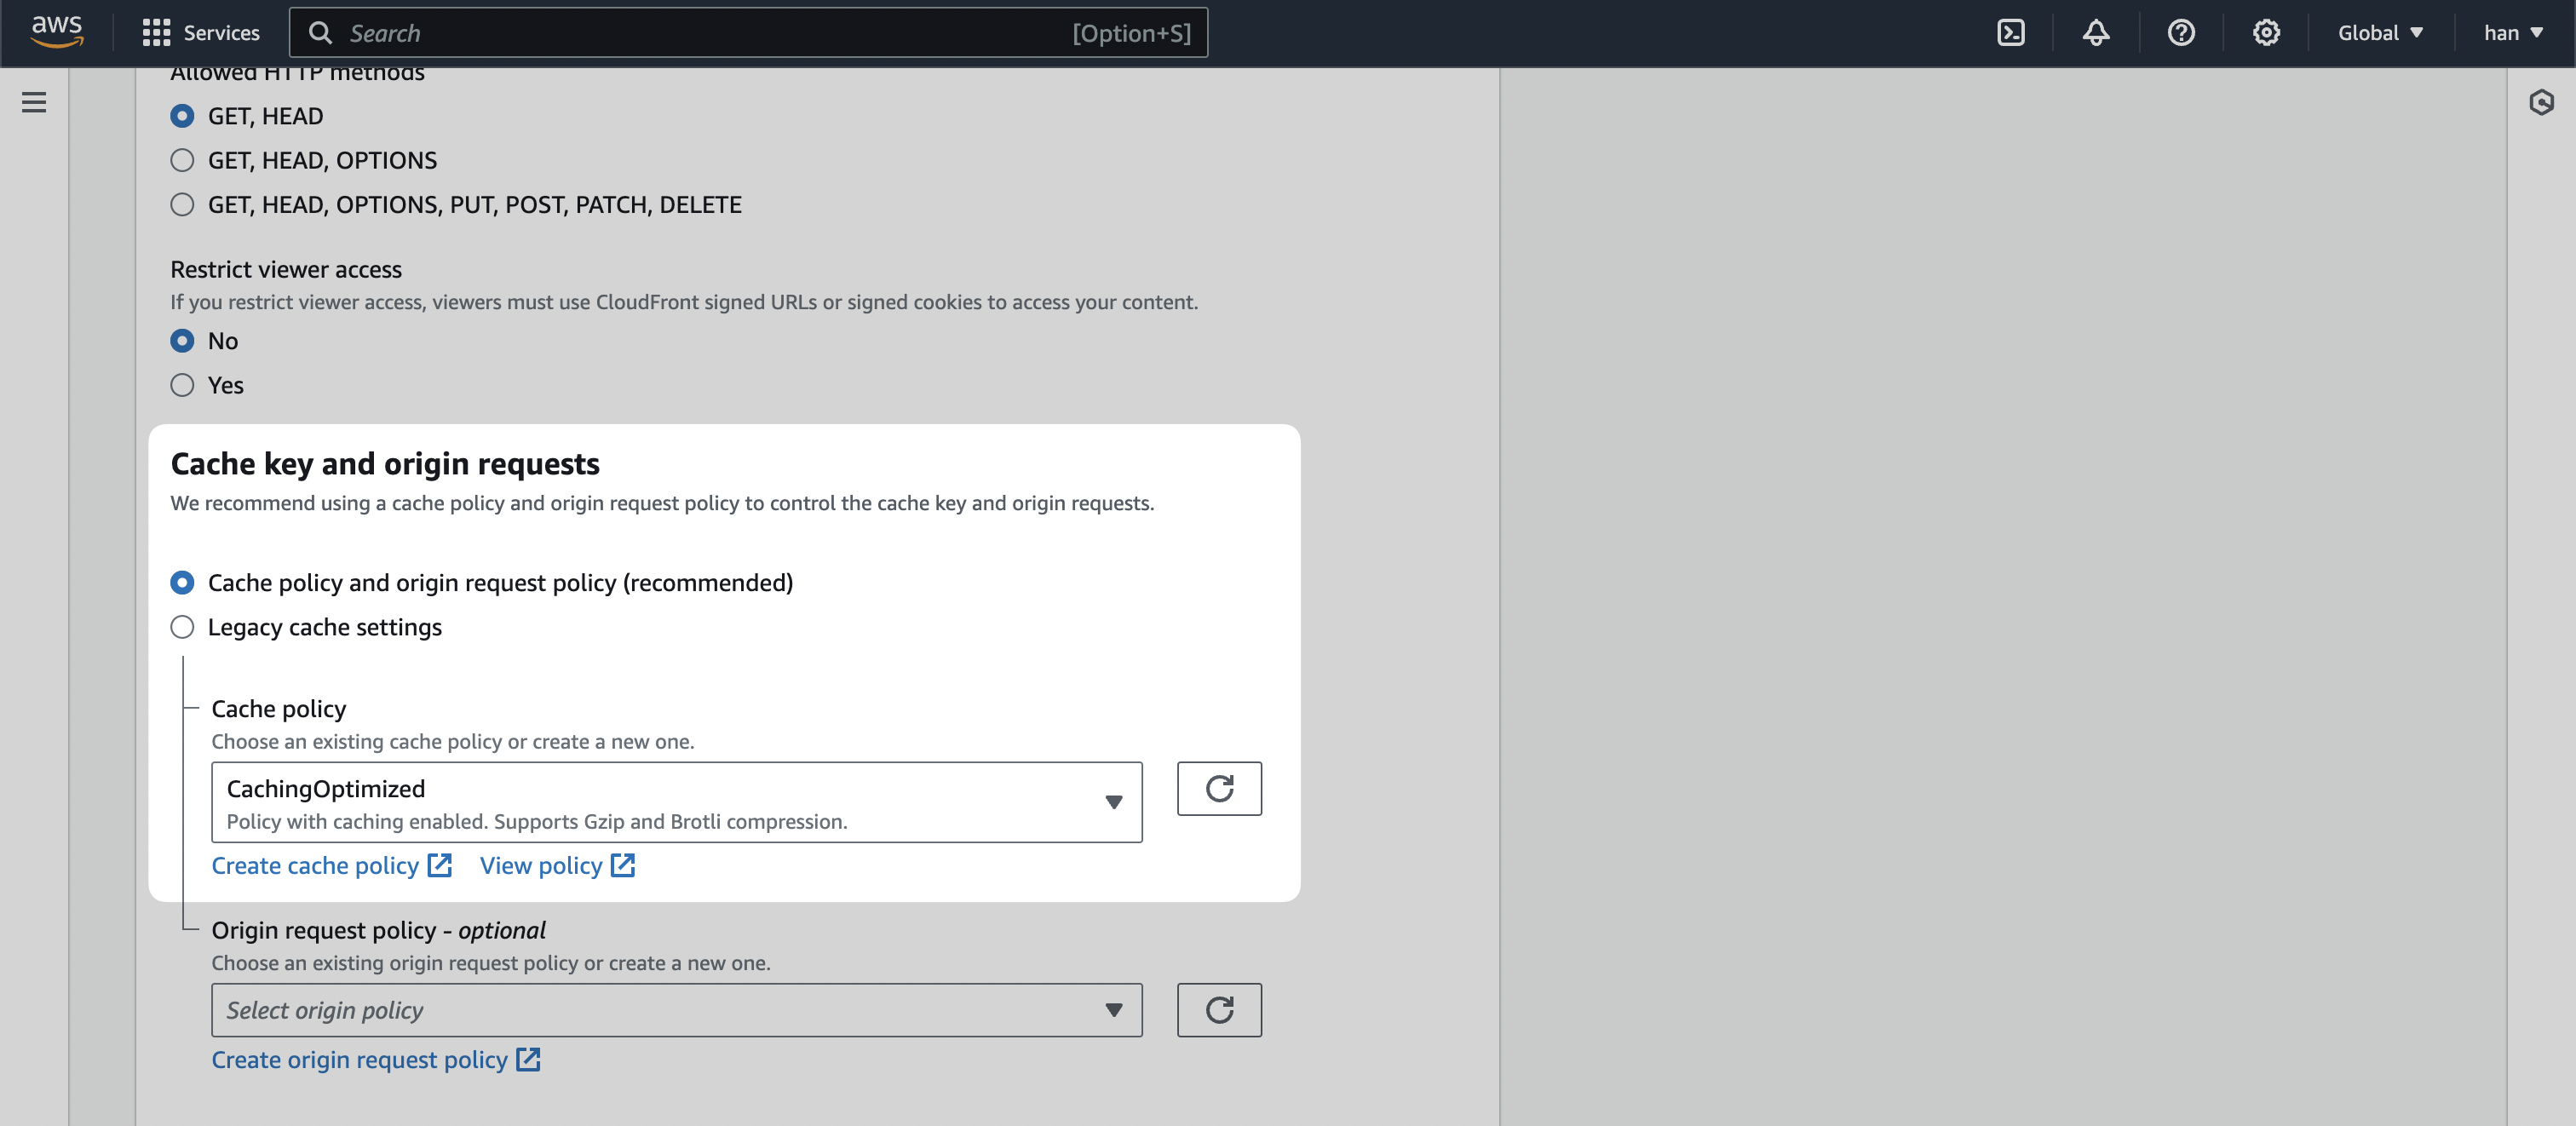
For **Cache key and origin requests**, select `Caching Optimized`.
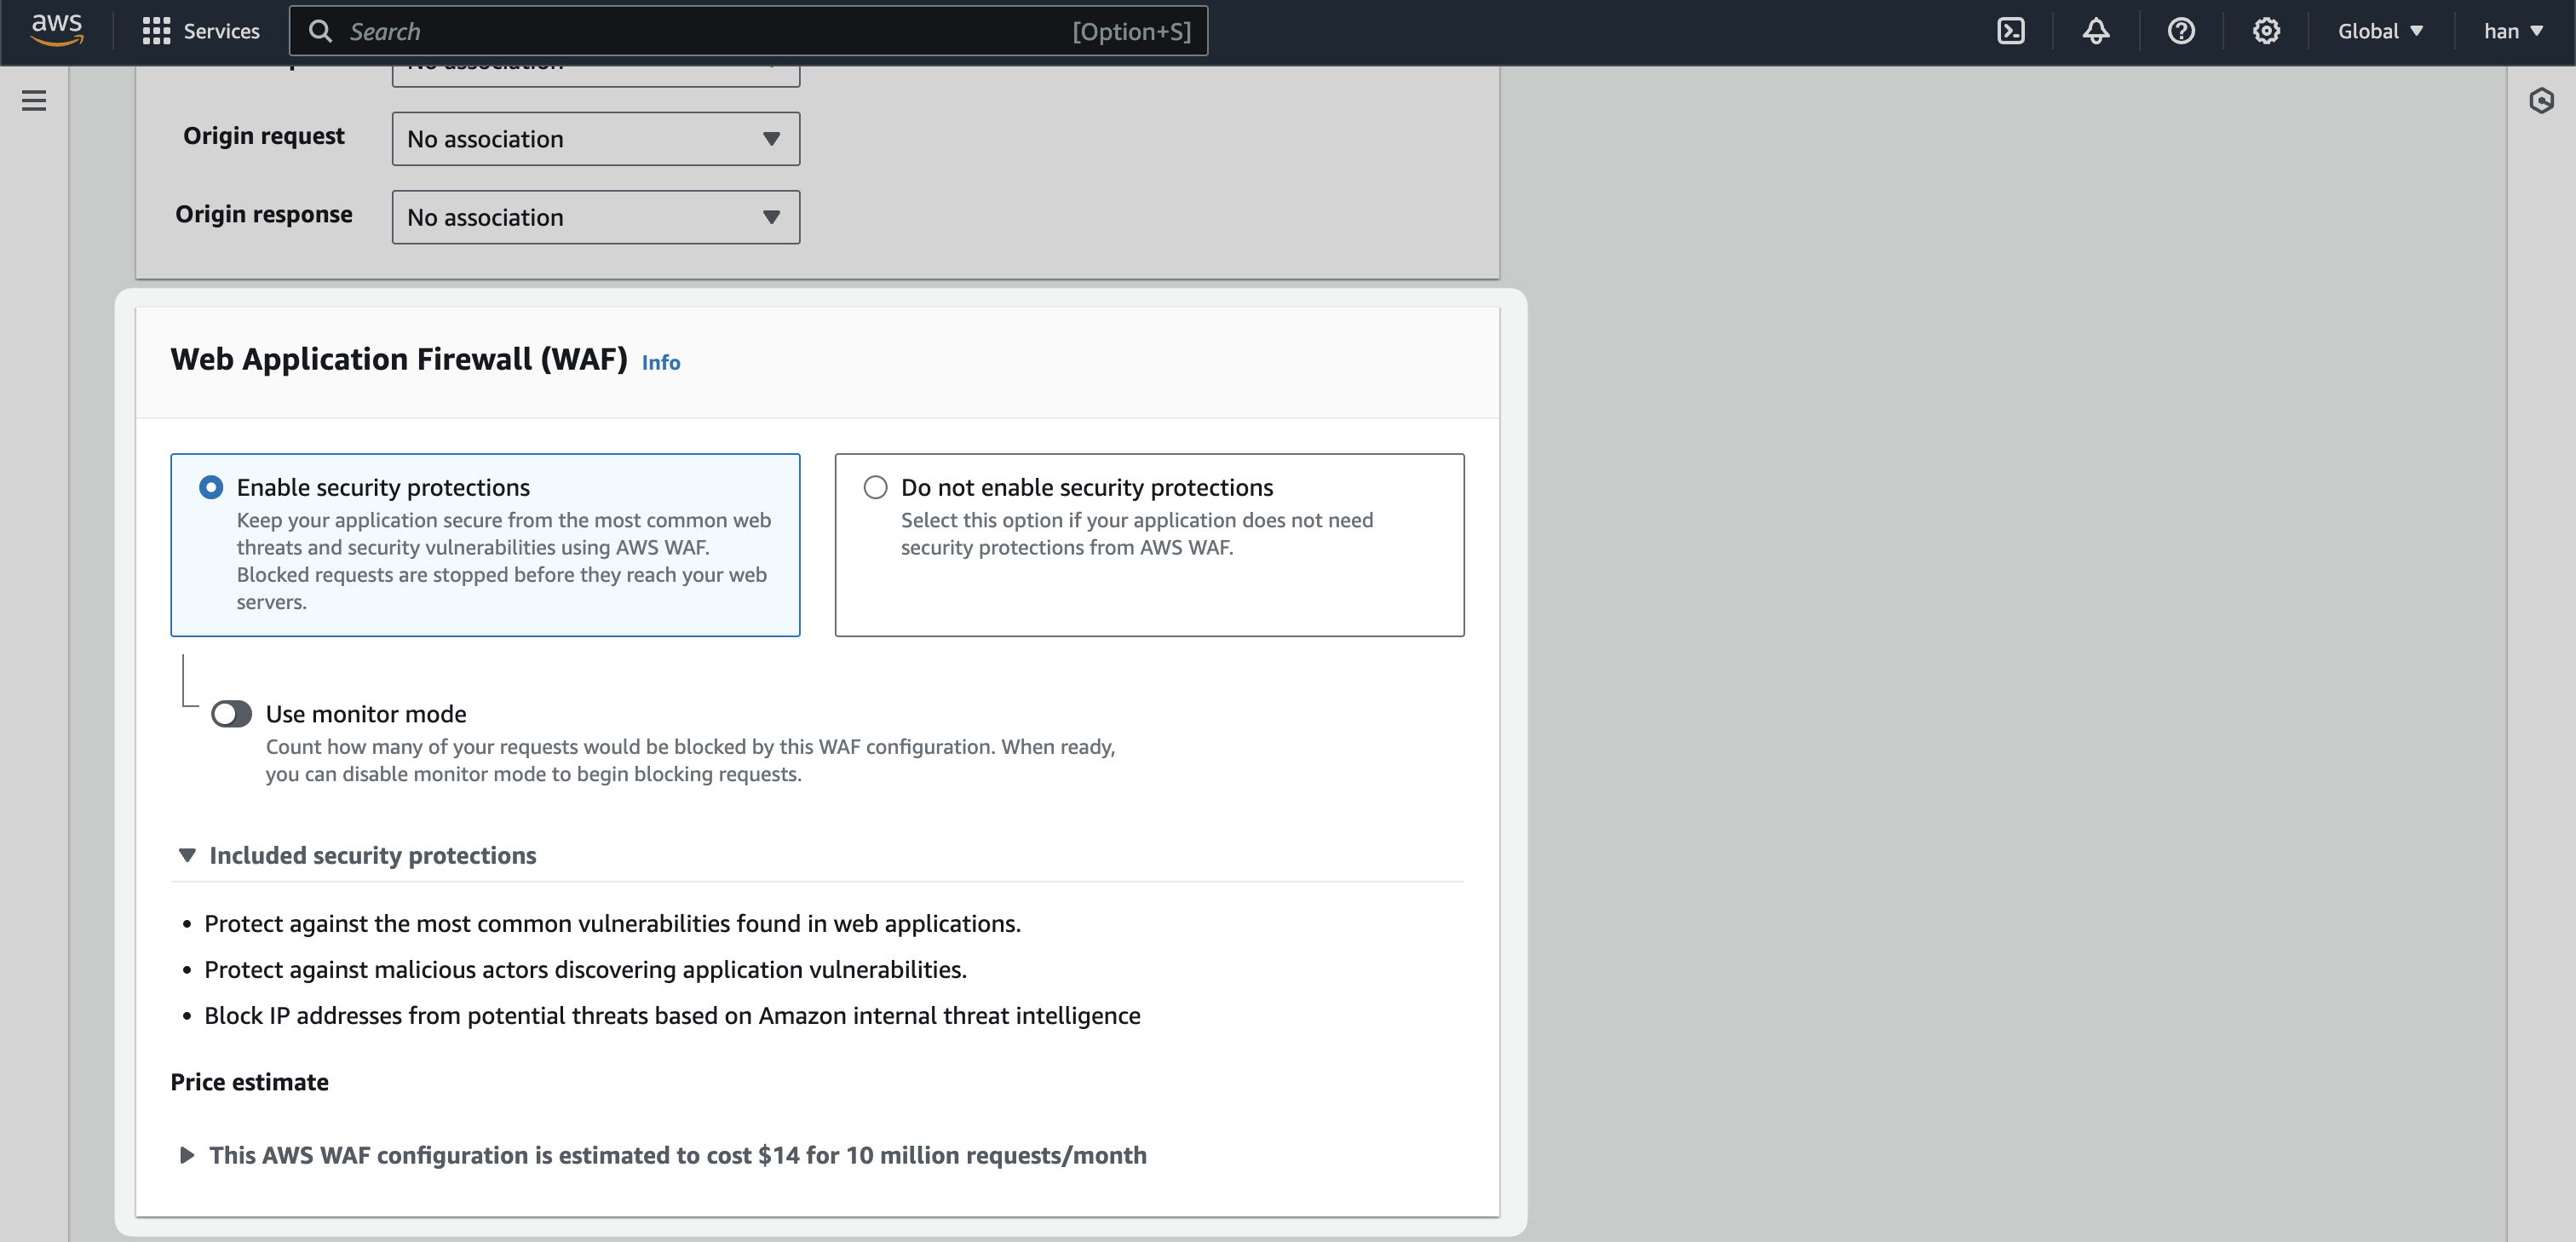
And for **Web Application Firewall (WAF)**, enable security protections
The remaining settings should be default. Click `Create distribution`.
## Add Default Origin
After creating the distribution, navigate to the `Origins` tab.
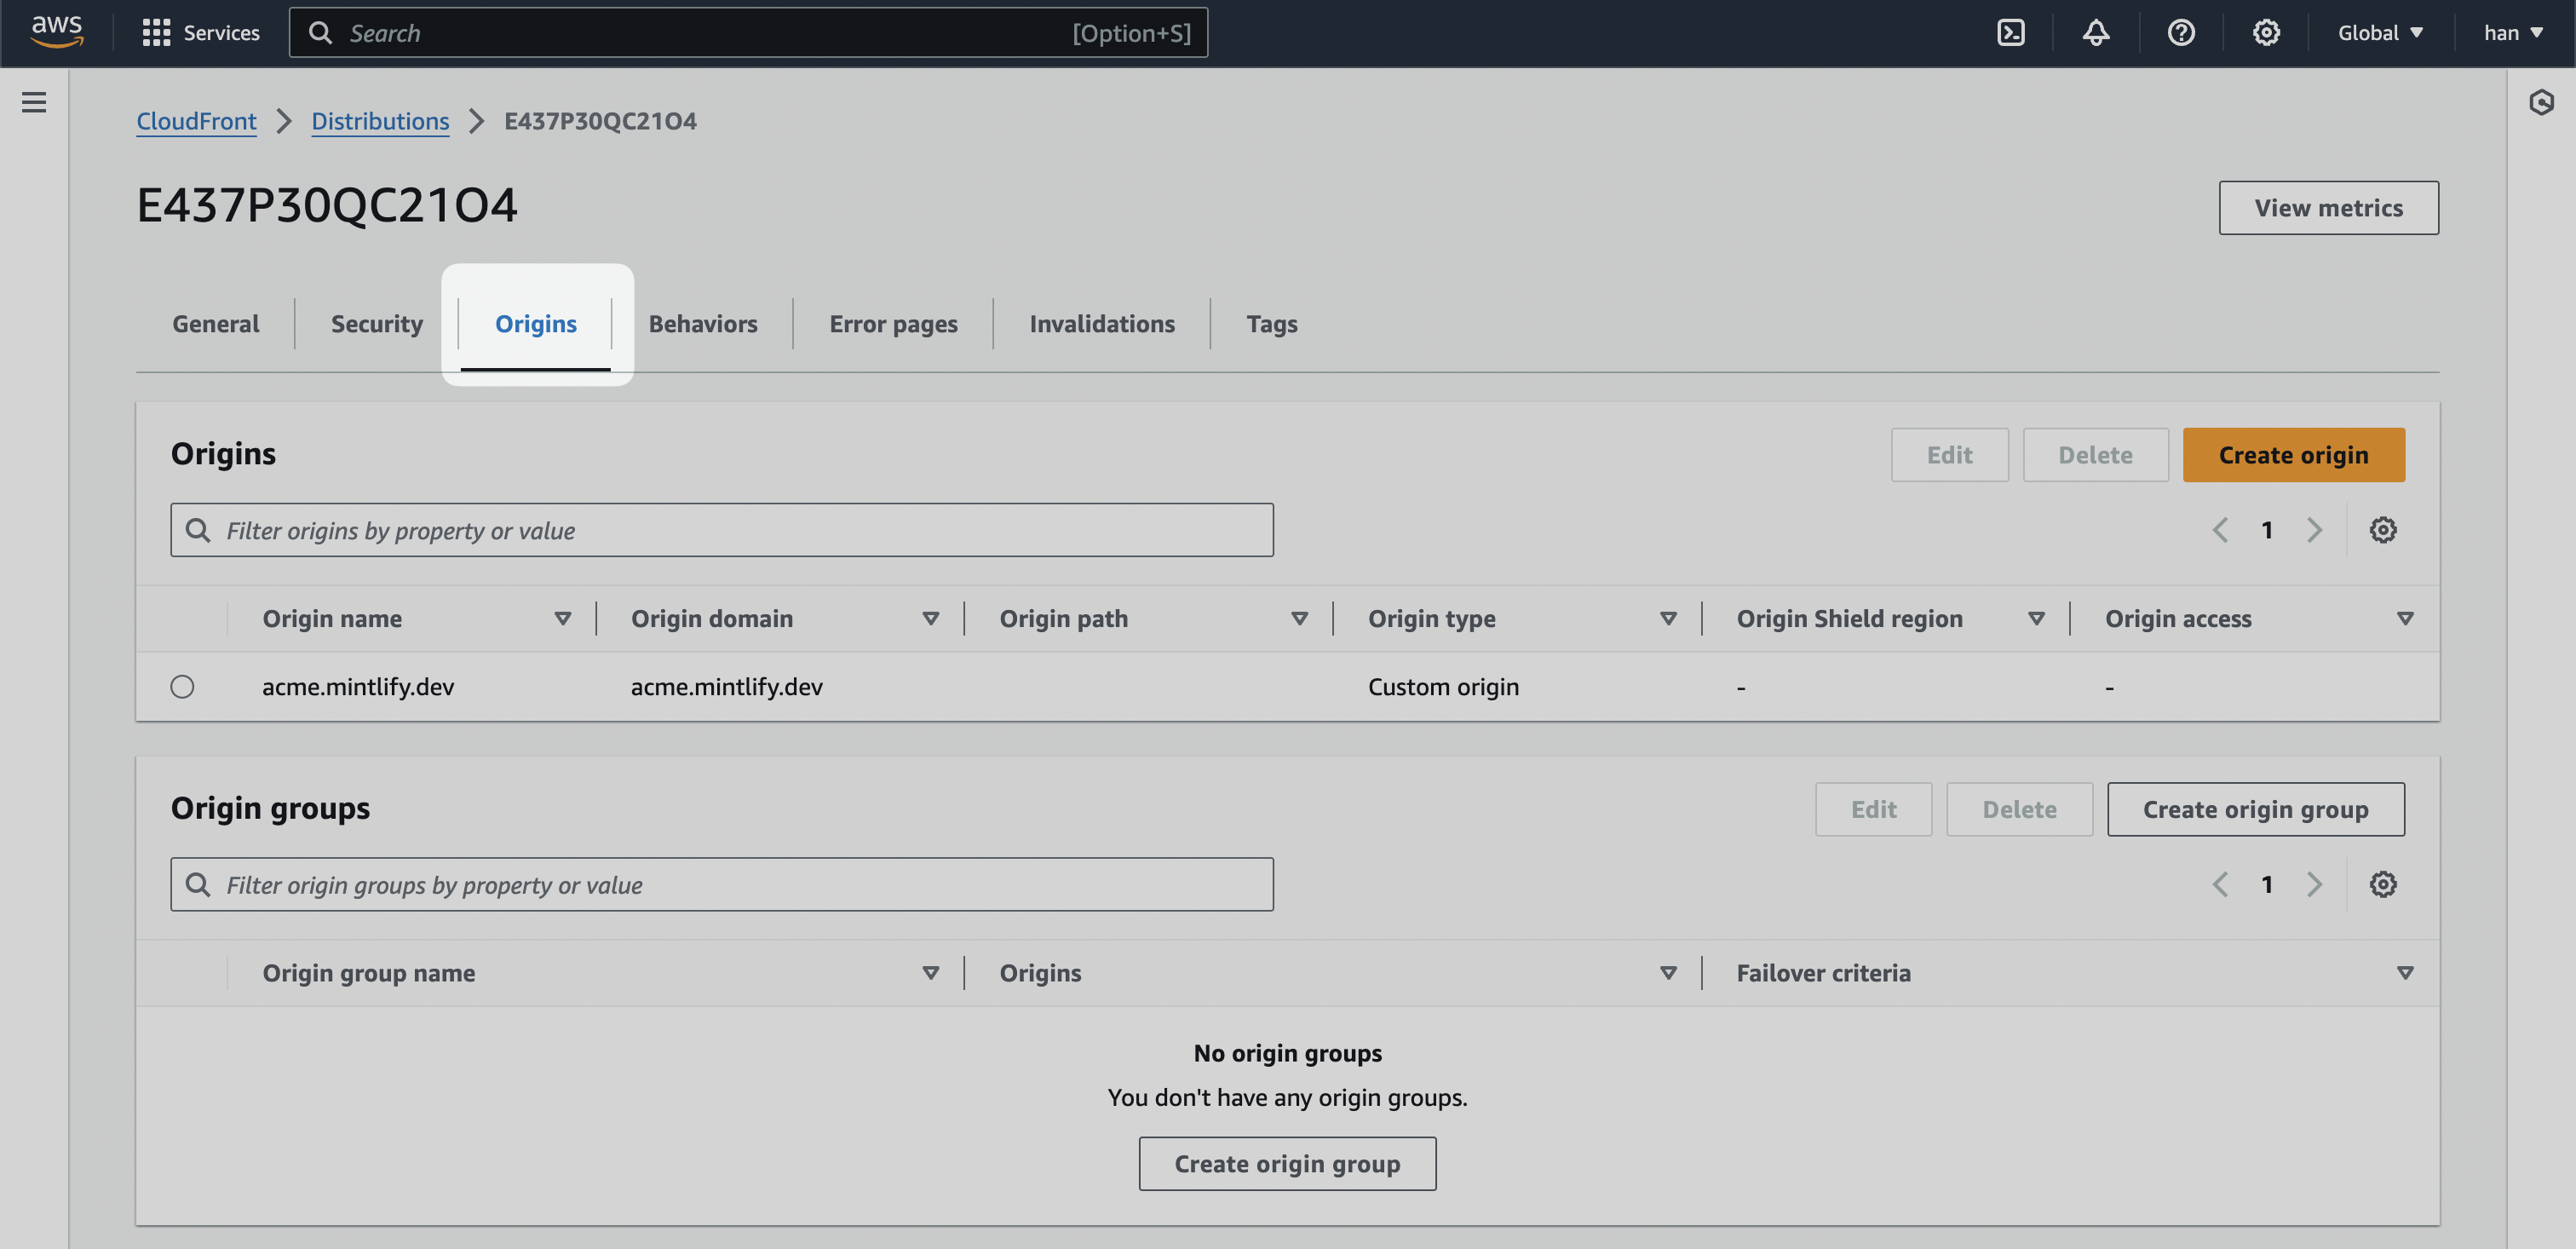
We want to find a staging URL that mirrors where the main domain (example.com). This is highly variant depending on how your landing page is hosted.
For instance, if your landing page is hosted on Webflow, you can use the
Webflow's staging URL. It would look like `.webflow.io`.
If you use Vercel, you use the `.vercel.app` domain available for every project.
If you're unsure on how to get a staging URL for your landing page, [contact
support](mailto:support@mintlify.com) and we'd be happy to help
Once you have the staging URL, ours for instance is [mintlify-landing-page.vercel.app](https://mintlify-landing-page.vercel.app), create a new Origin and add it as the **Origin domain**.
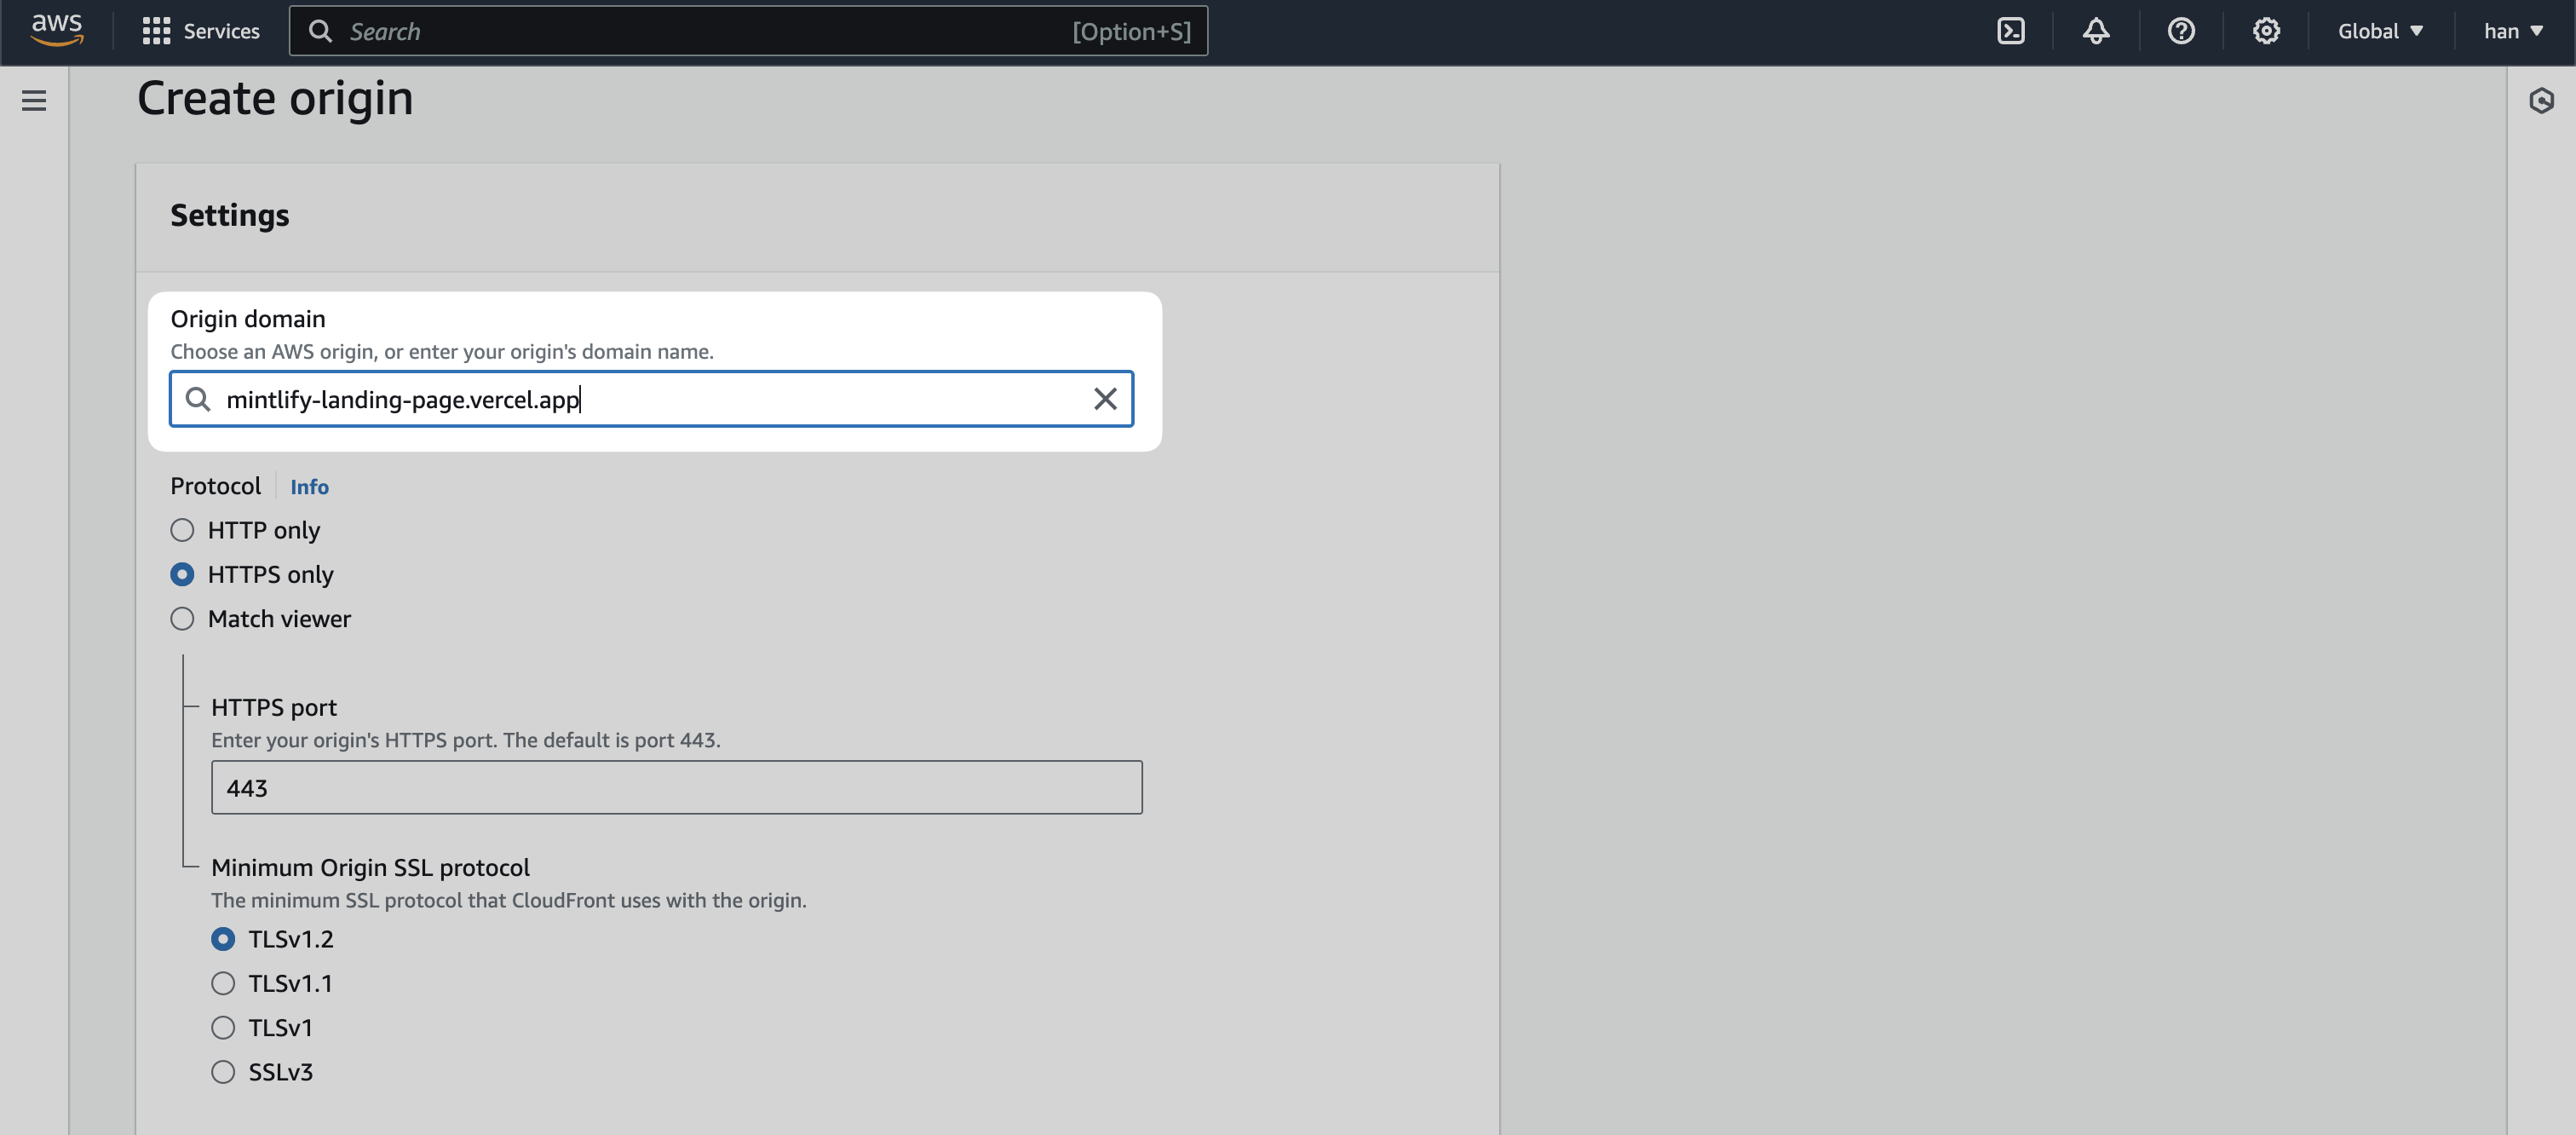
By this point, you should have two Origins - one with `[SUBDOMAIN].mintlify.app` and another with with staging URL.
## Set Behaviors
Behaviors in Cloudfront enables control over the subpath logic. At a high level, we're looking to create the following logic.
* **If a user lands on /docs**, go to `[SUBDOMAIN].mintlify.dev`
* **If a user lands on any other page**, go the current landing page
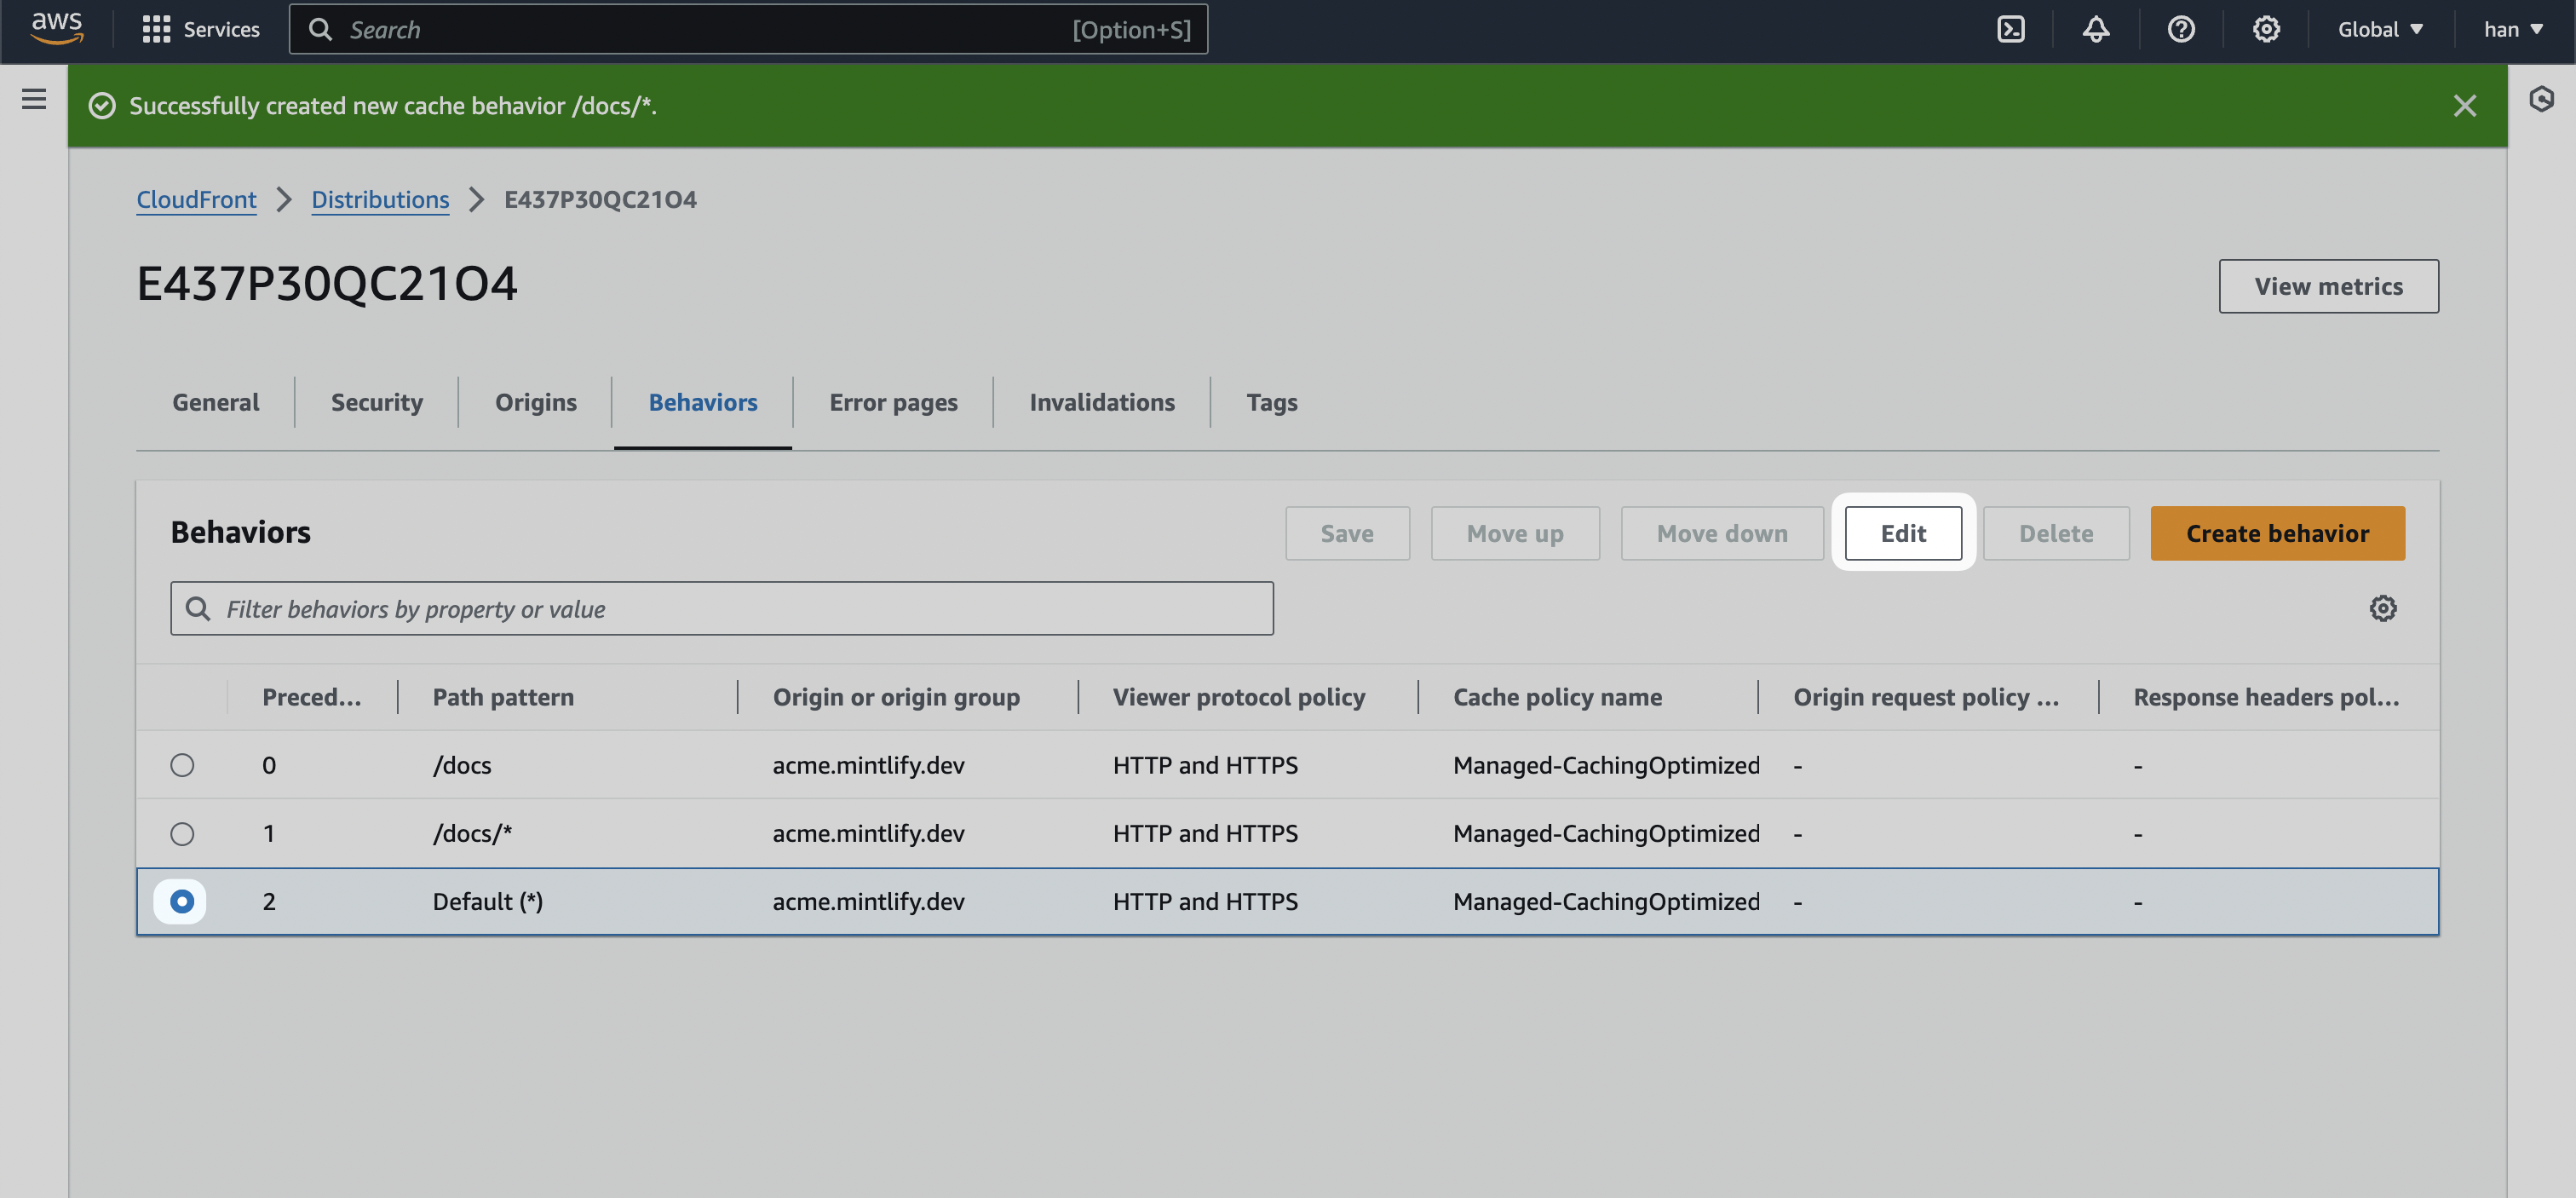
We're going to create three behaviors by clicking on the `Create behavior` button.
### `/docs/*`
The first behavior should have a **Path pattern** of `/docs/*` with **Origin and origin groups** pointing to the `.mintlify.dev` URL (in our case `acme.mintlify.dev`)
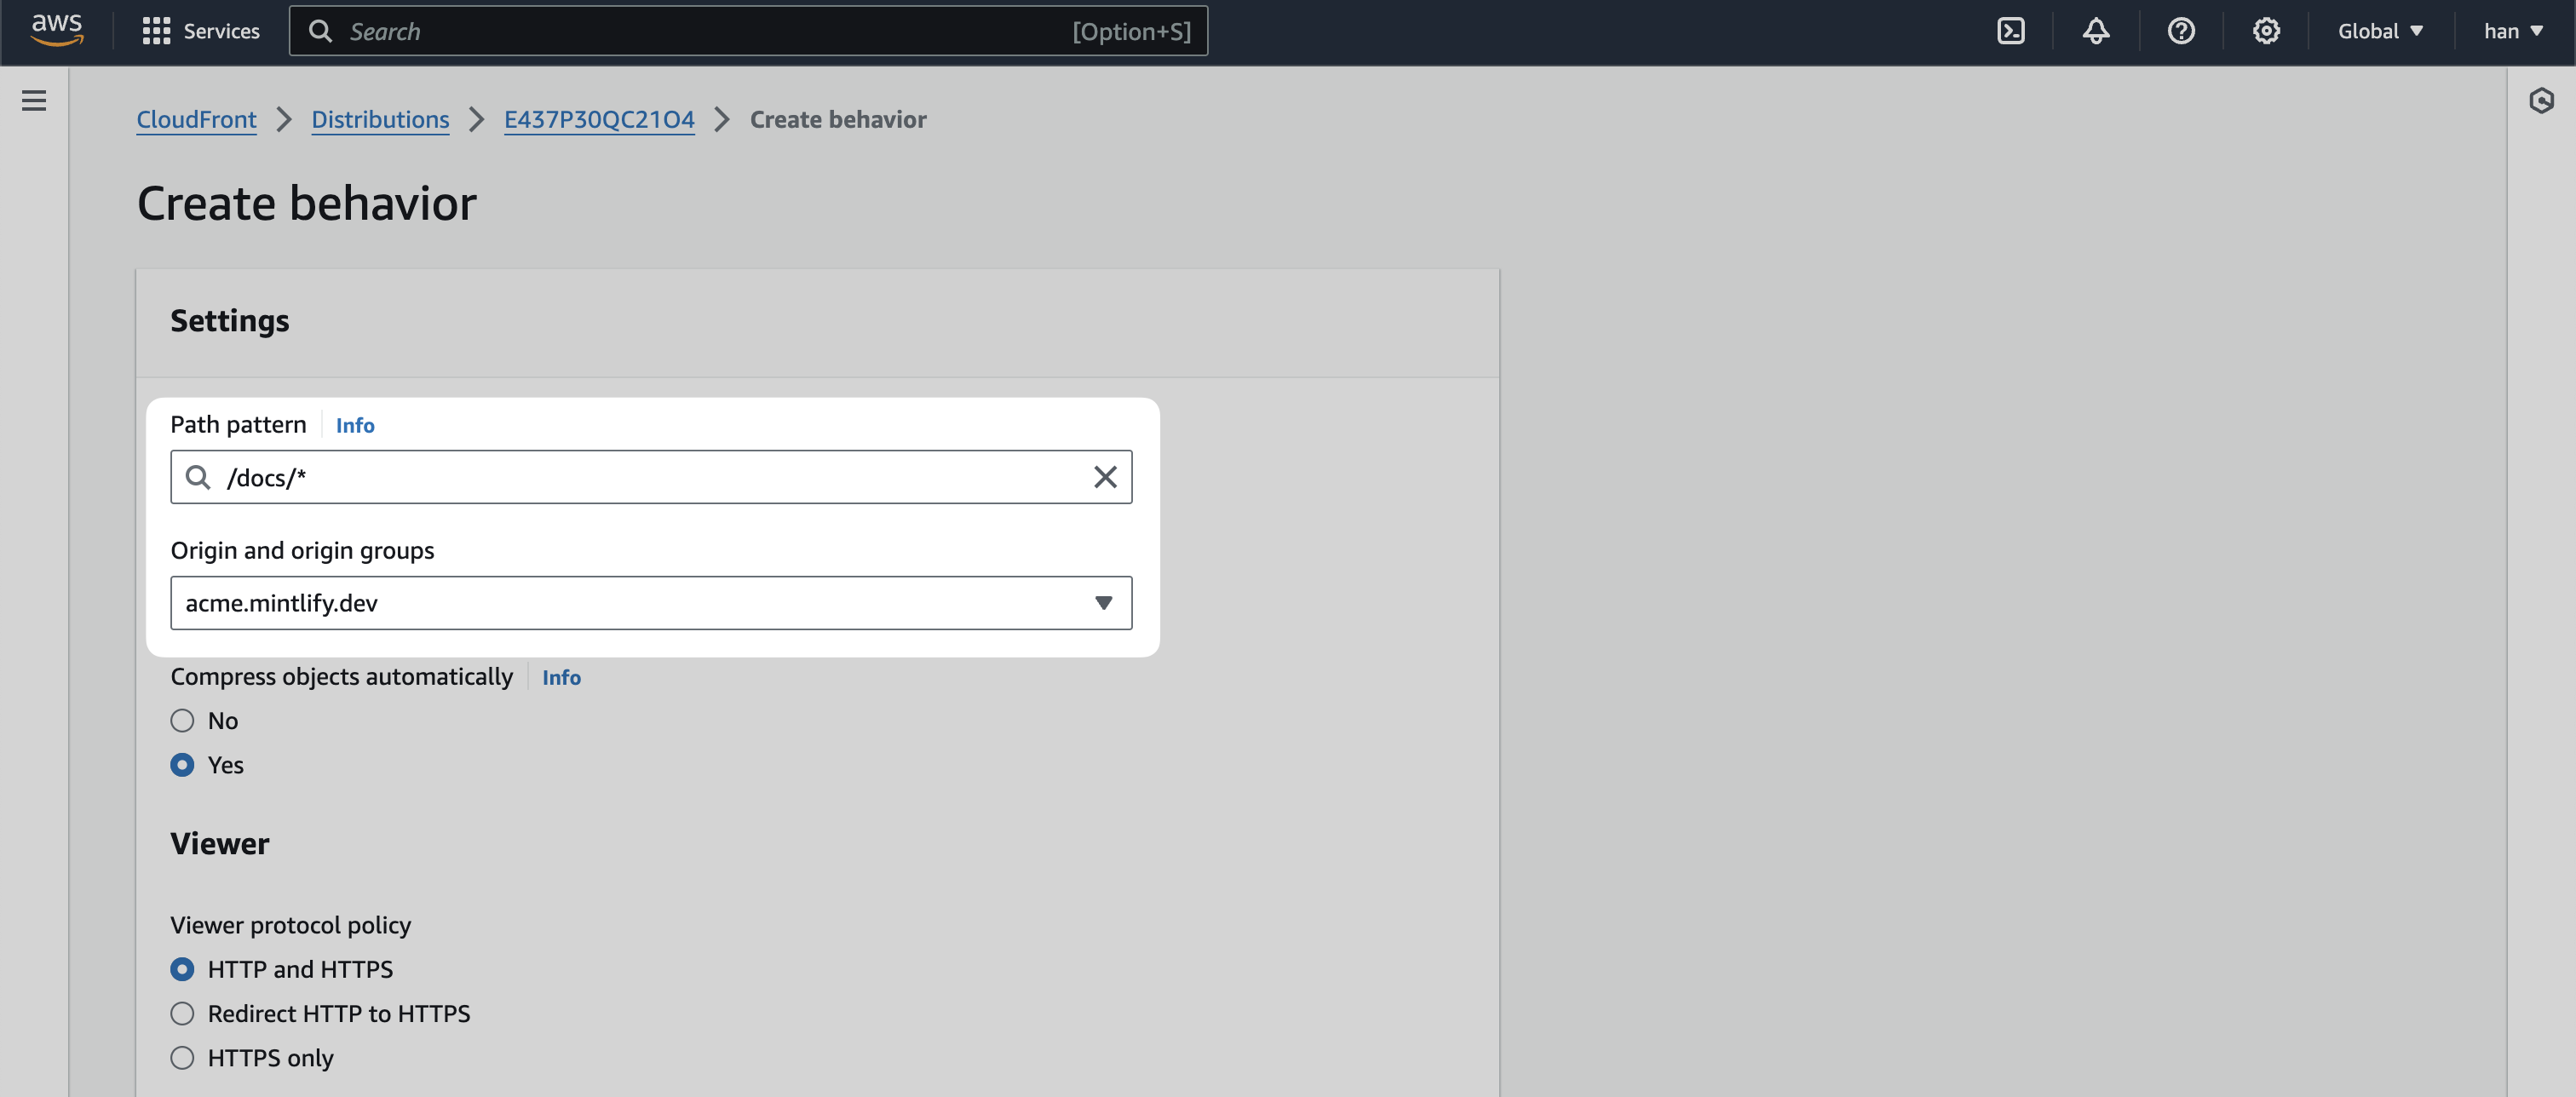
For **Cache policy**, select `CachingOptimized` and create behavior.
### `/docs`
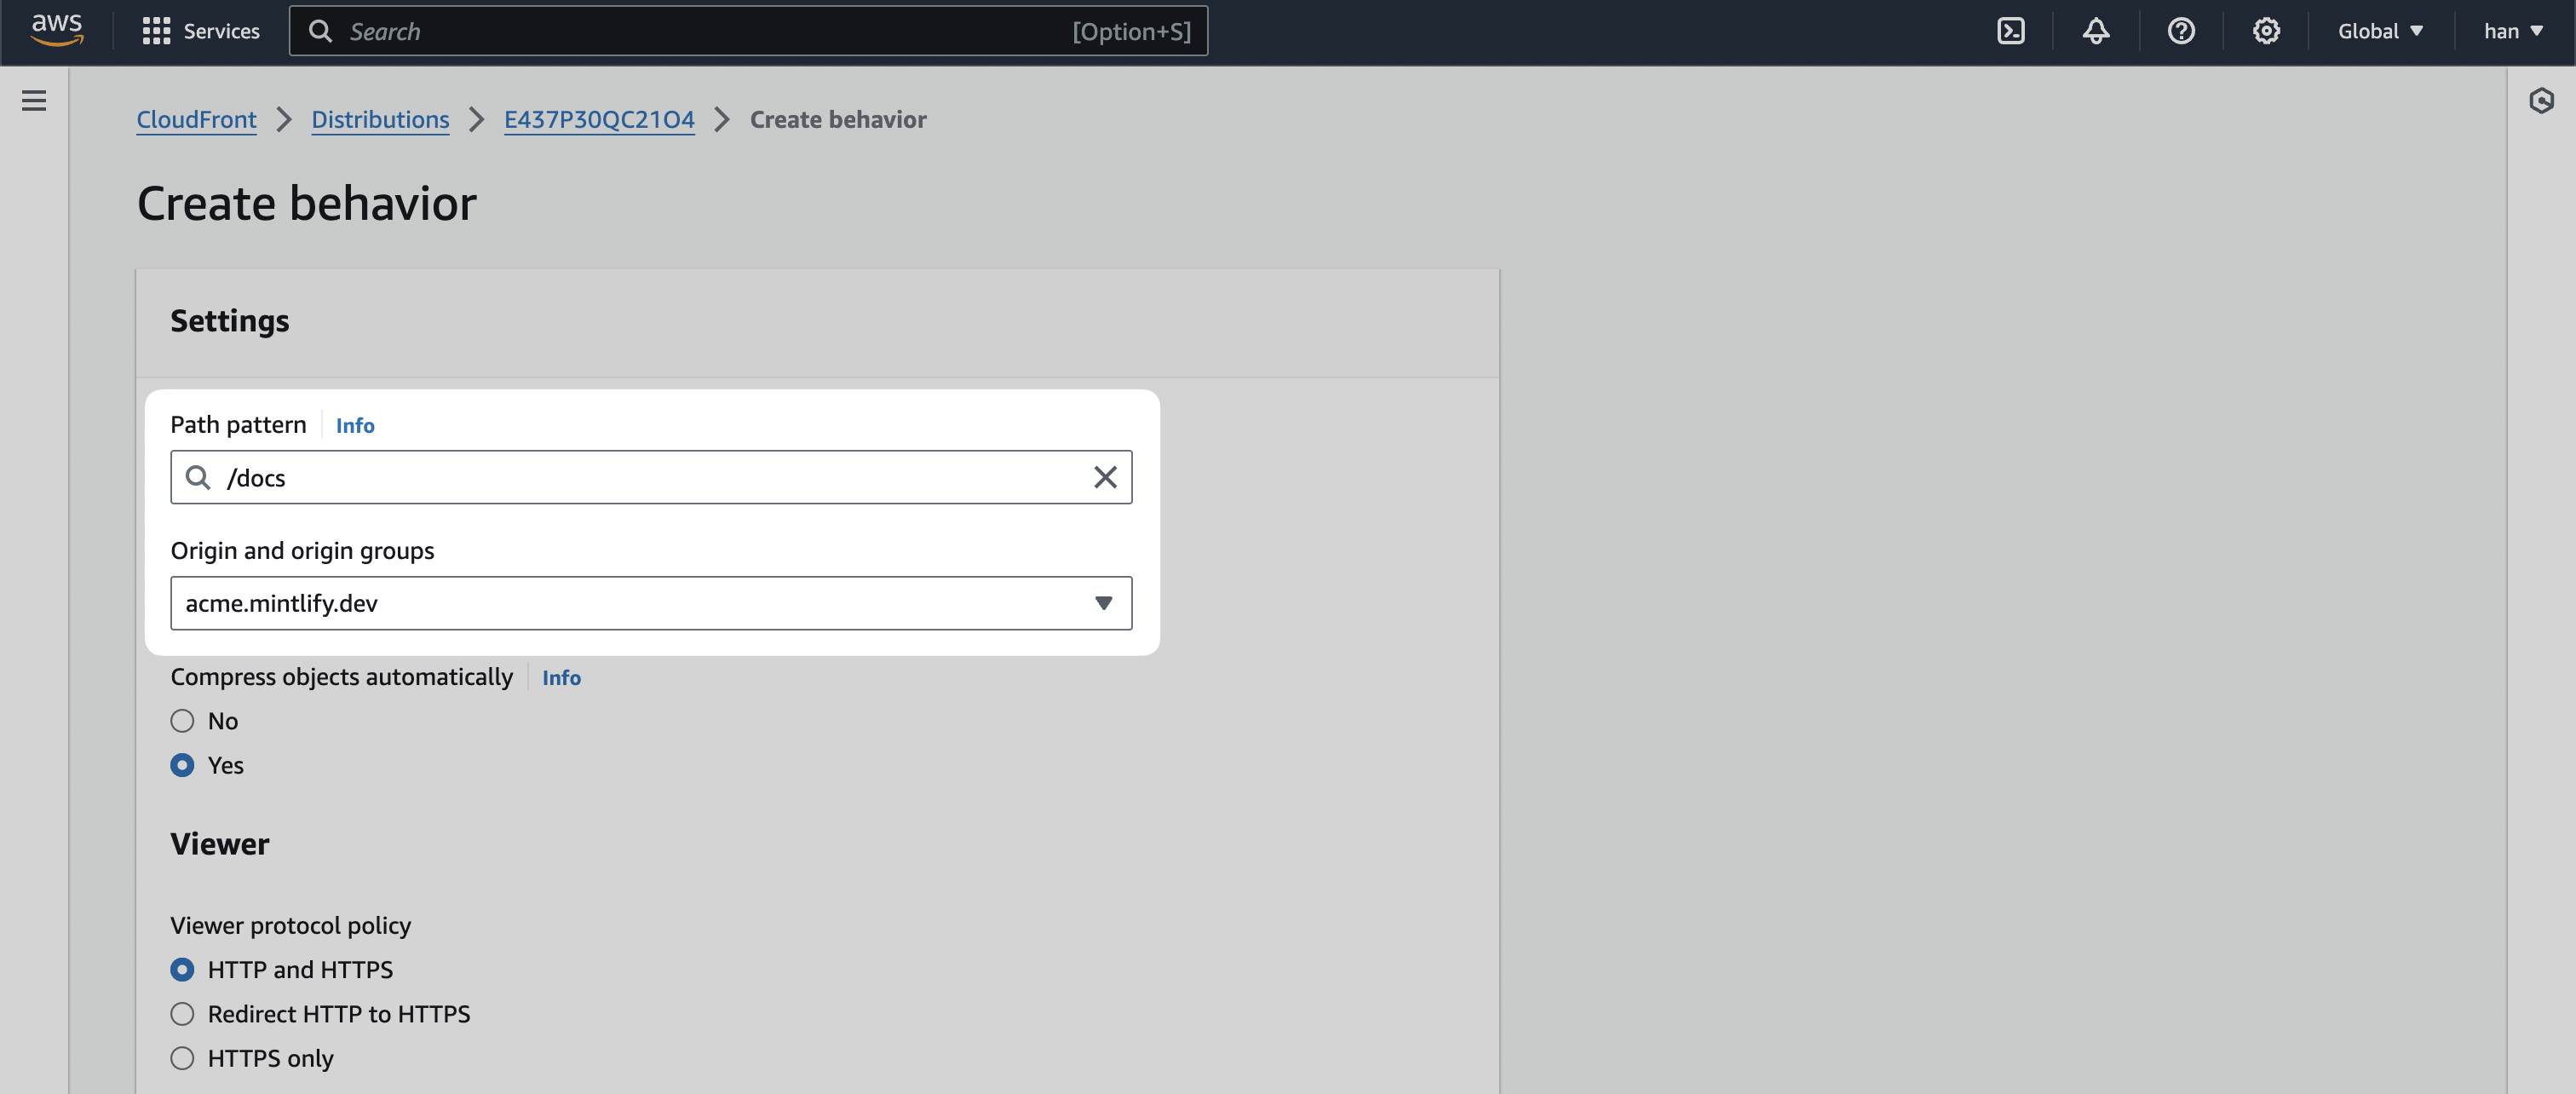
The second behavior should be the same as the first one but with a **Path pattern** of `/docs` and **Origin and origin groups** pointing to the same `.mintlify.dev` URL.
### `Default (*)`
Lastly, we're going to edit the `Default (*)` behavior.
We're going to change the default behavior's **Origin and origin groups** to the staging URL (in our case `mintlify-landing-page.vercel.app`).
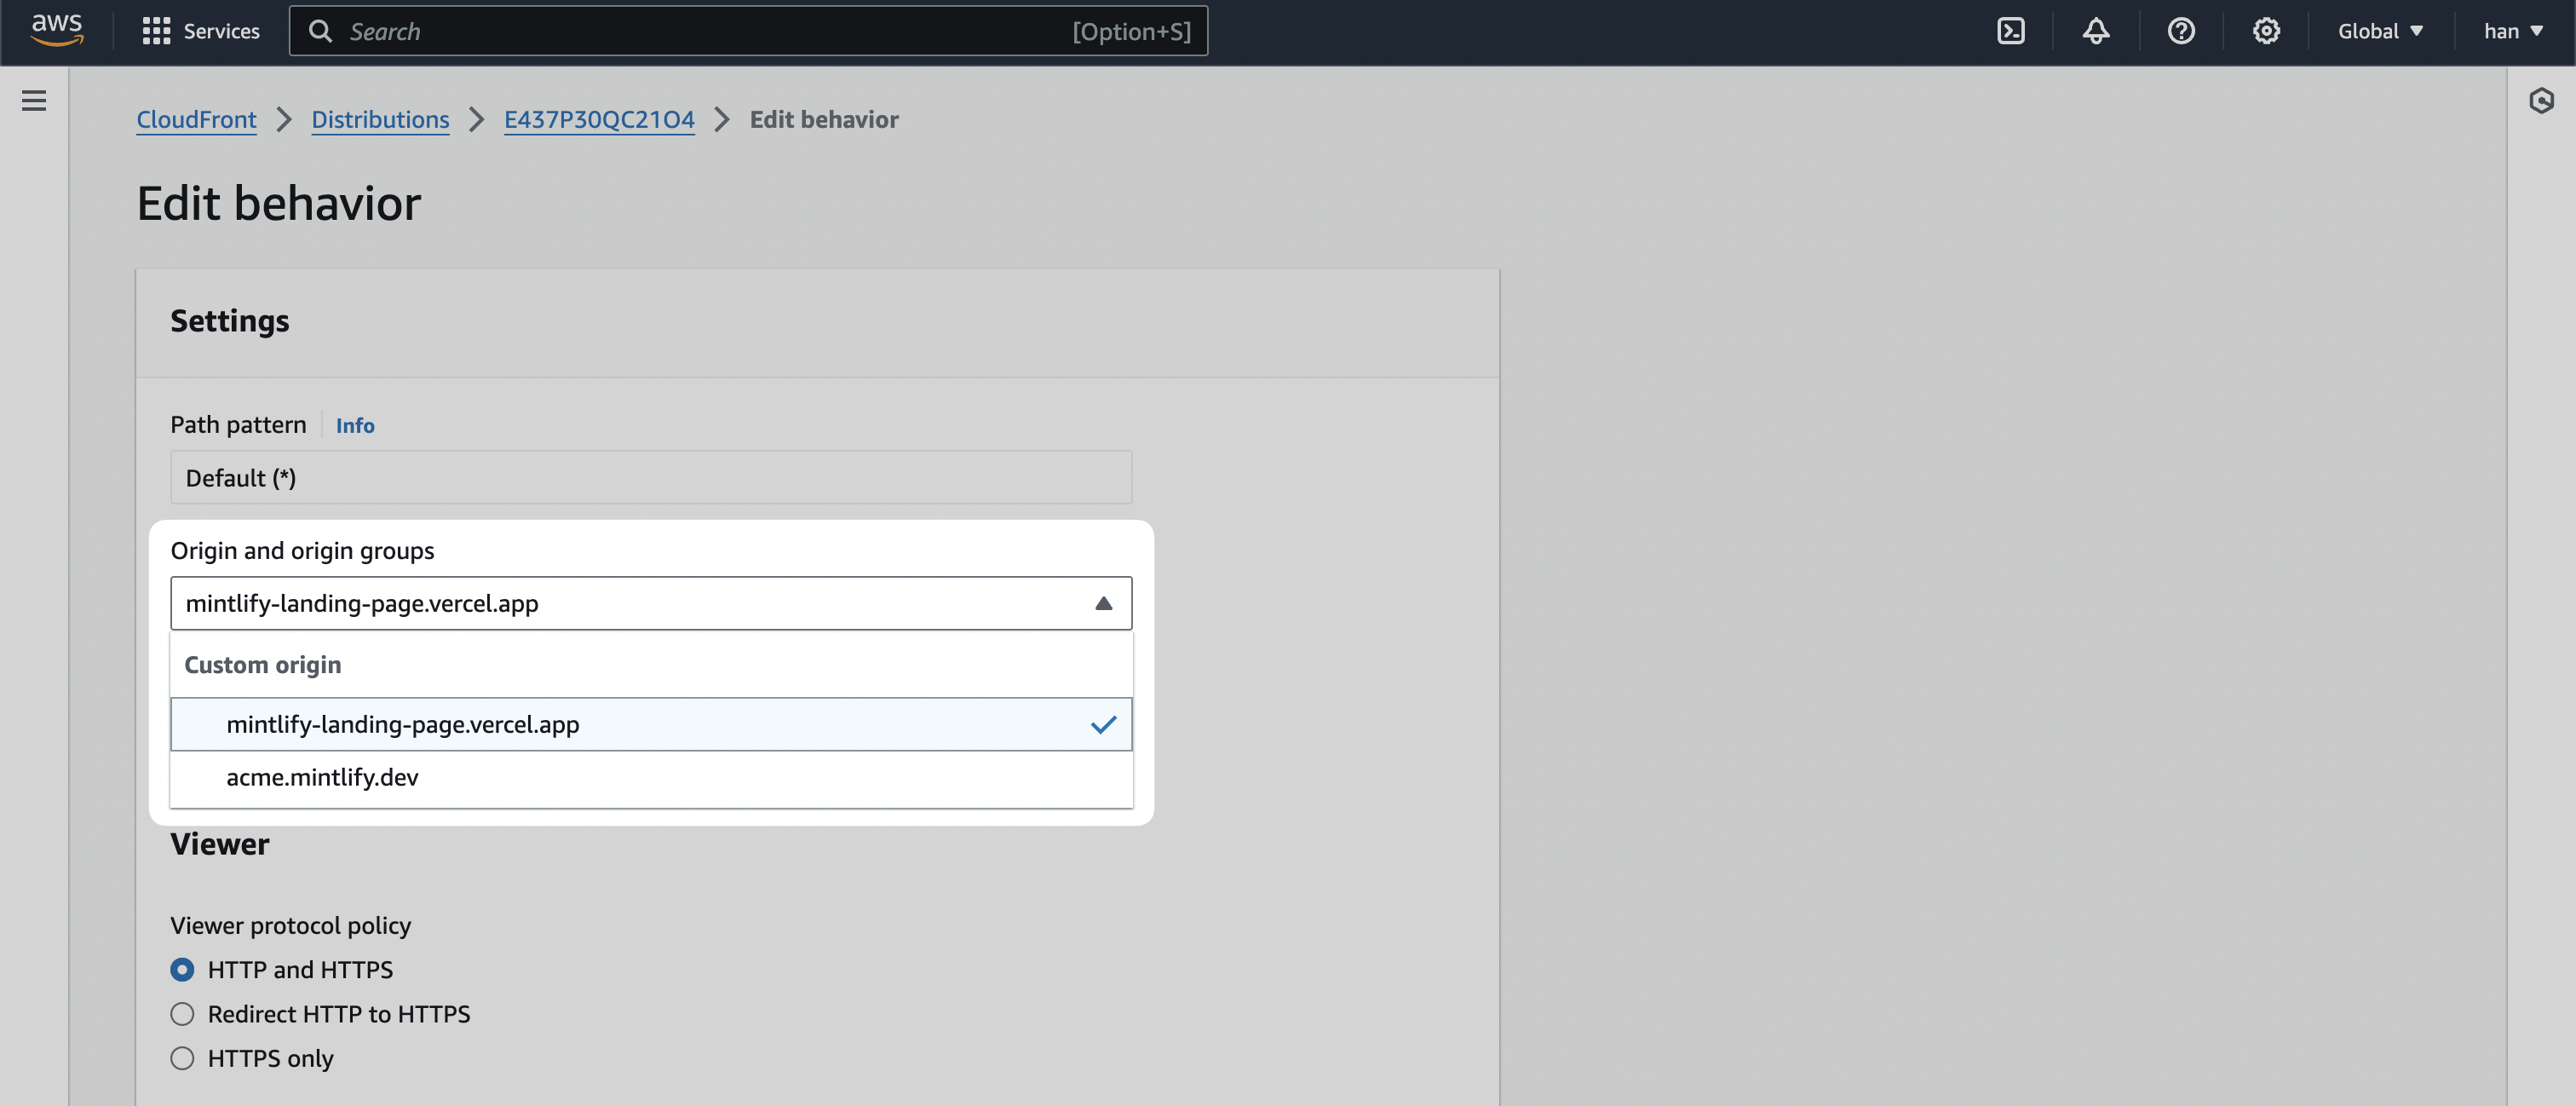
Click on `Save changes`.
## Preview Distribution
You can now test if your distribution is set up properly by going to the `General` tab and visiting the **Distribution domain name** URL.
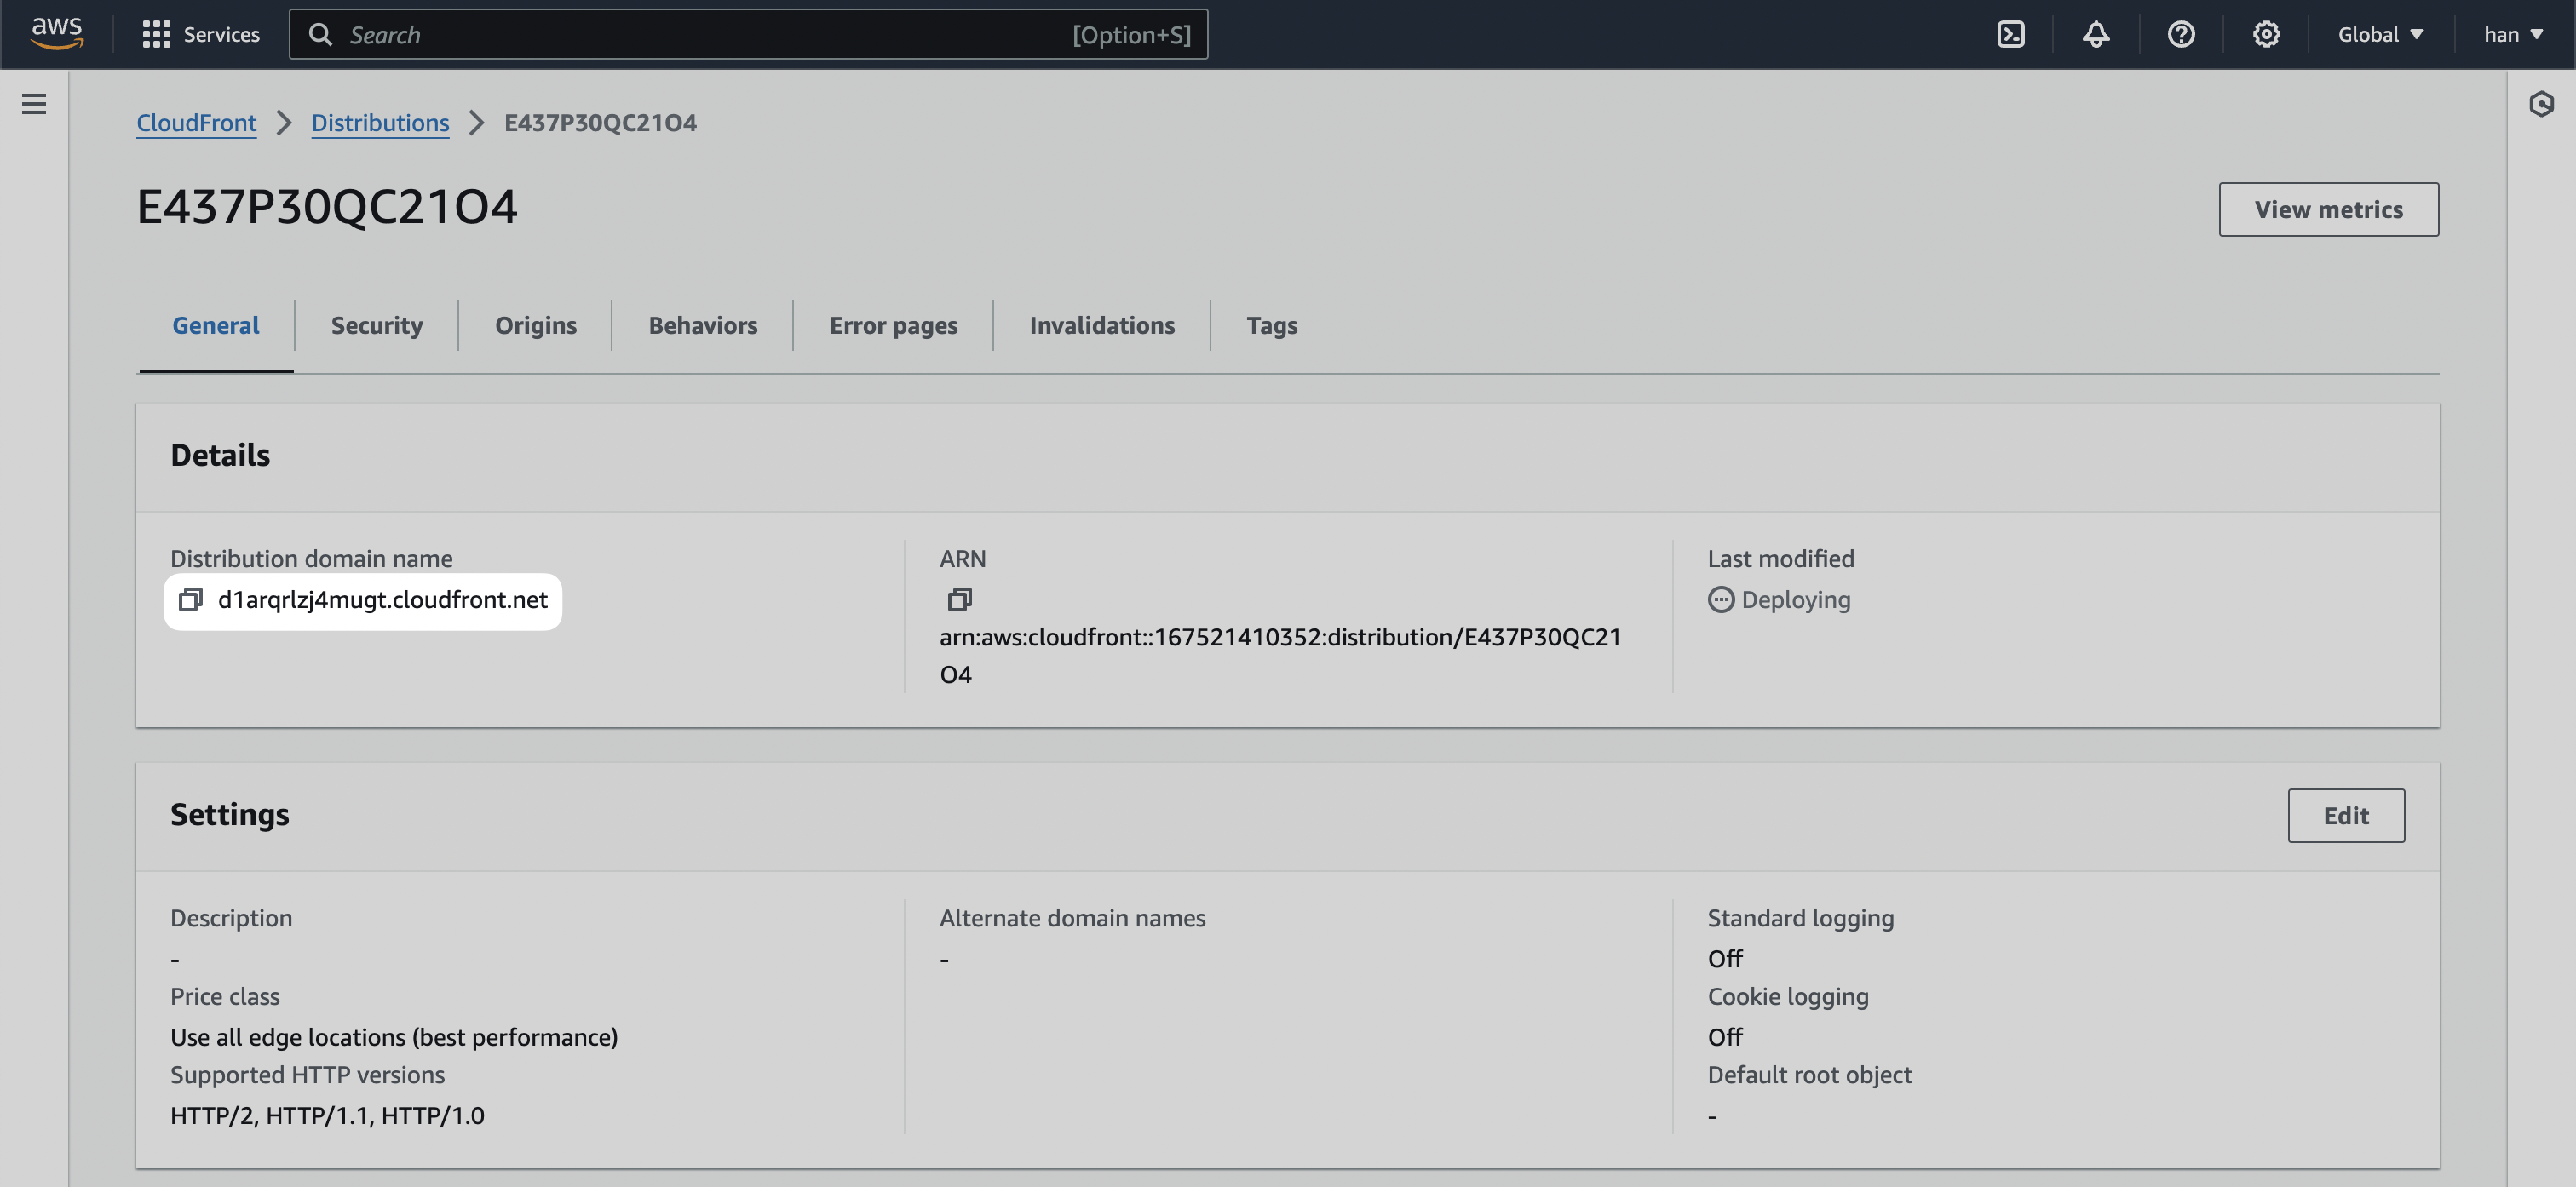
All pages should be directing to your main landing page, but if you append `/docs` to the URL, you should see it going to the Mintlify documentation instance.
## Connecting it with Route53
Now, we're going to bring the functionality of the Cloudfront distribution into your primary domain.
For this section, you can also refer to AWS's official guide on [Configuring
Amazon Route 53 to route traffic to a CloudFront
distribution](https://docs.aws.amazon.com/Route53/latest/DeveloperGuide/routing-to-cloudfront-distribution.html#routing-to-cloudfront-distribution-config)
Navigate to [Route53](https://aws.amazon.com/route53) inside the AWS console, and click into the `Hosted zone` for your primary domain. Click on `Create record`
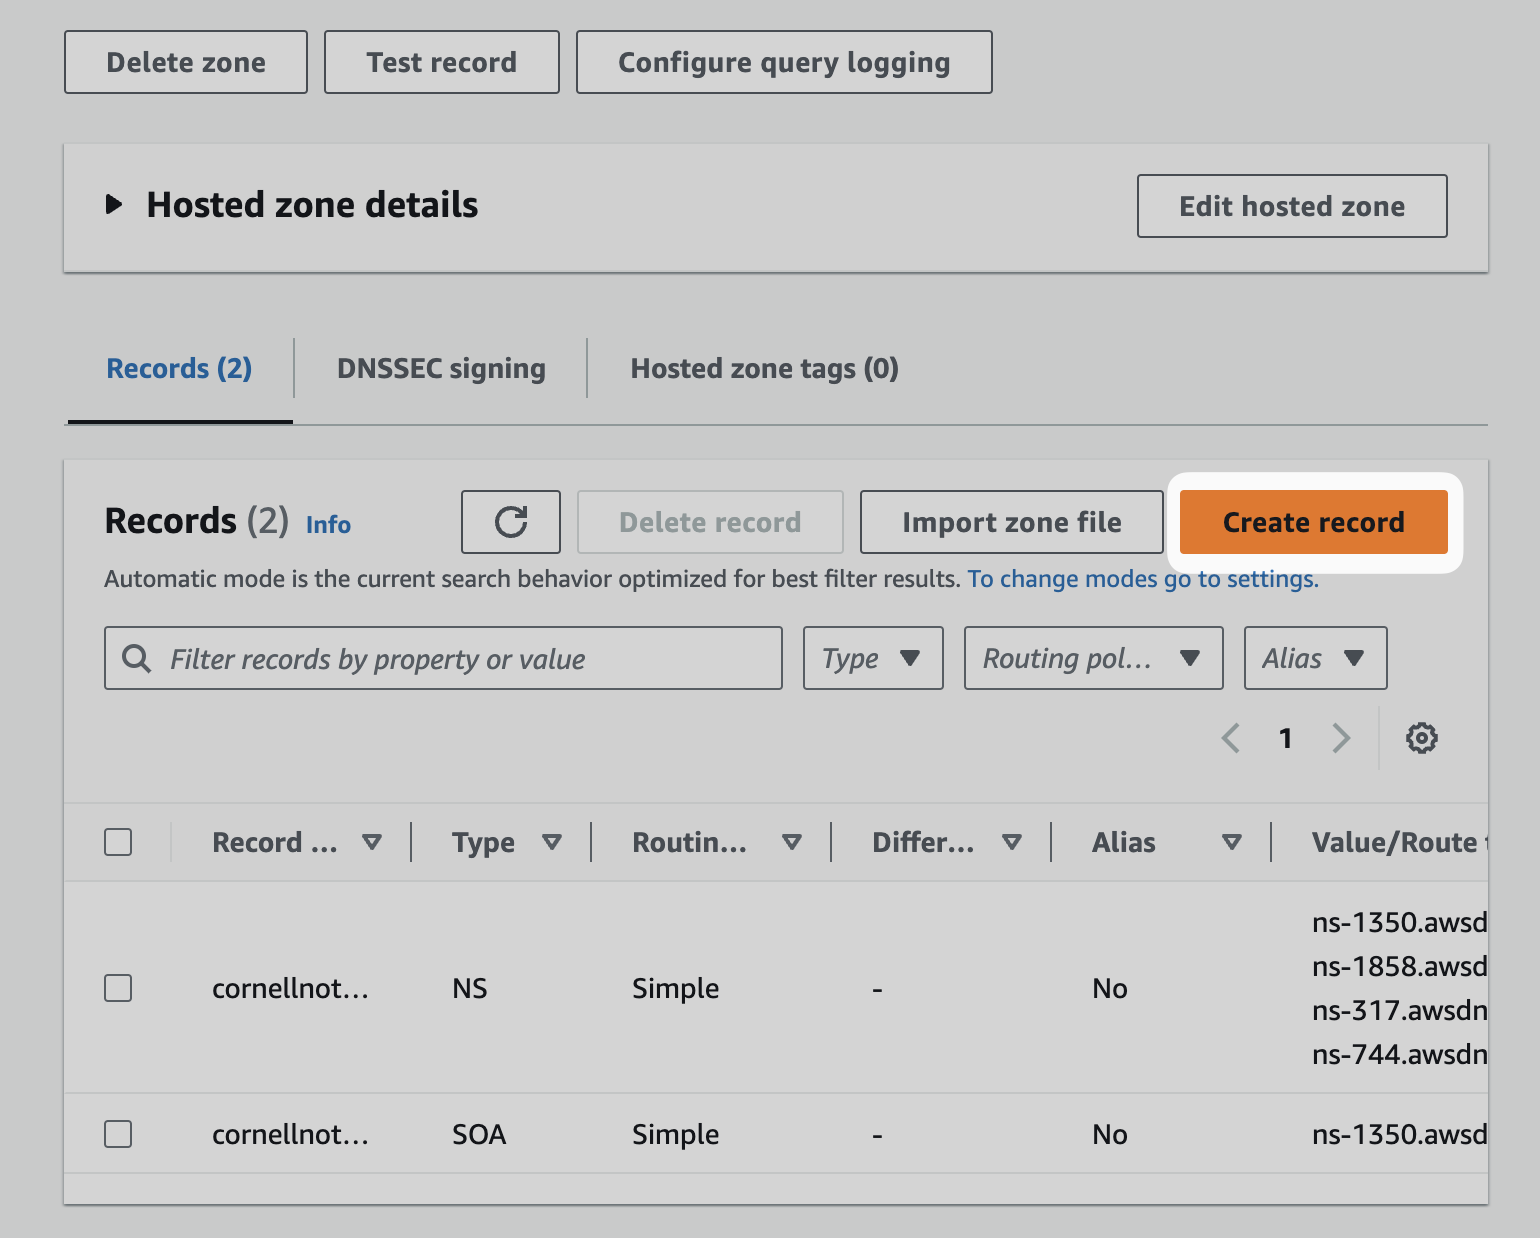
Toggle `Alias` and then **Route traffic to** the `Alias to CloudFront distribution` option.
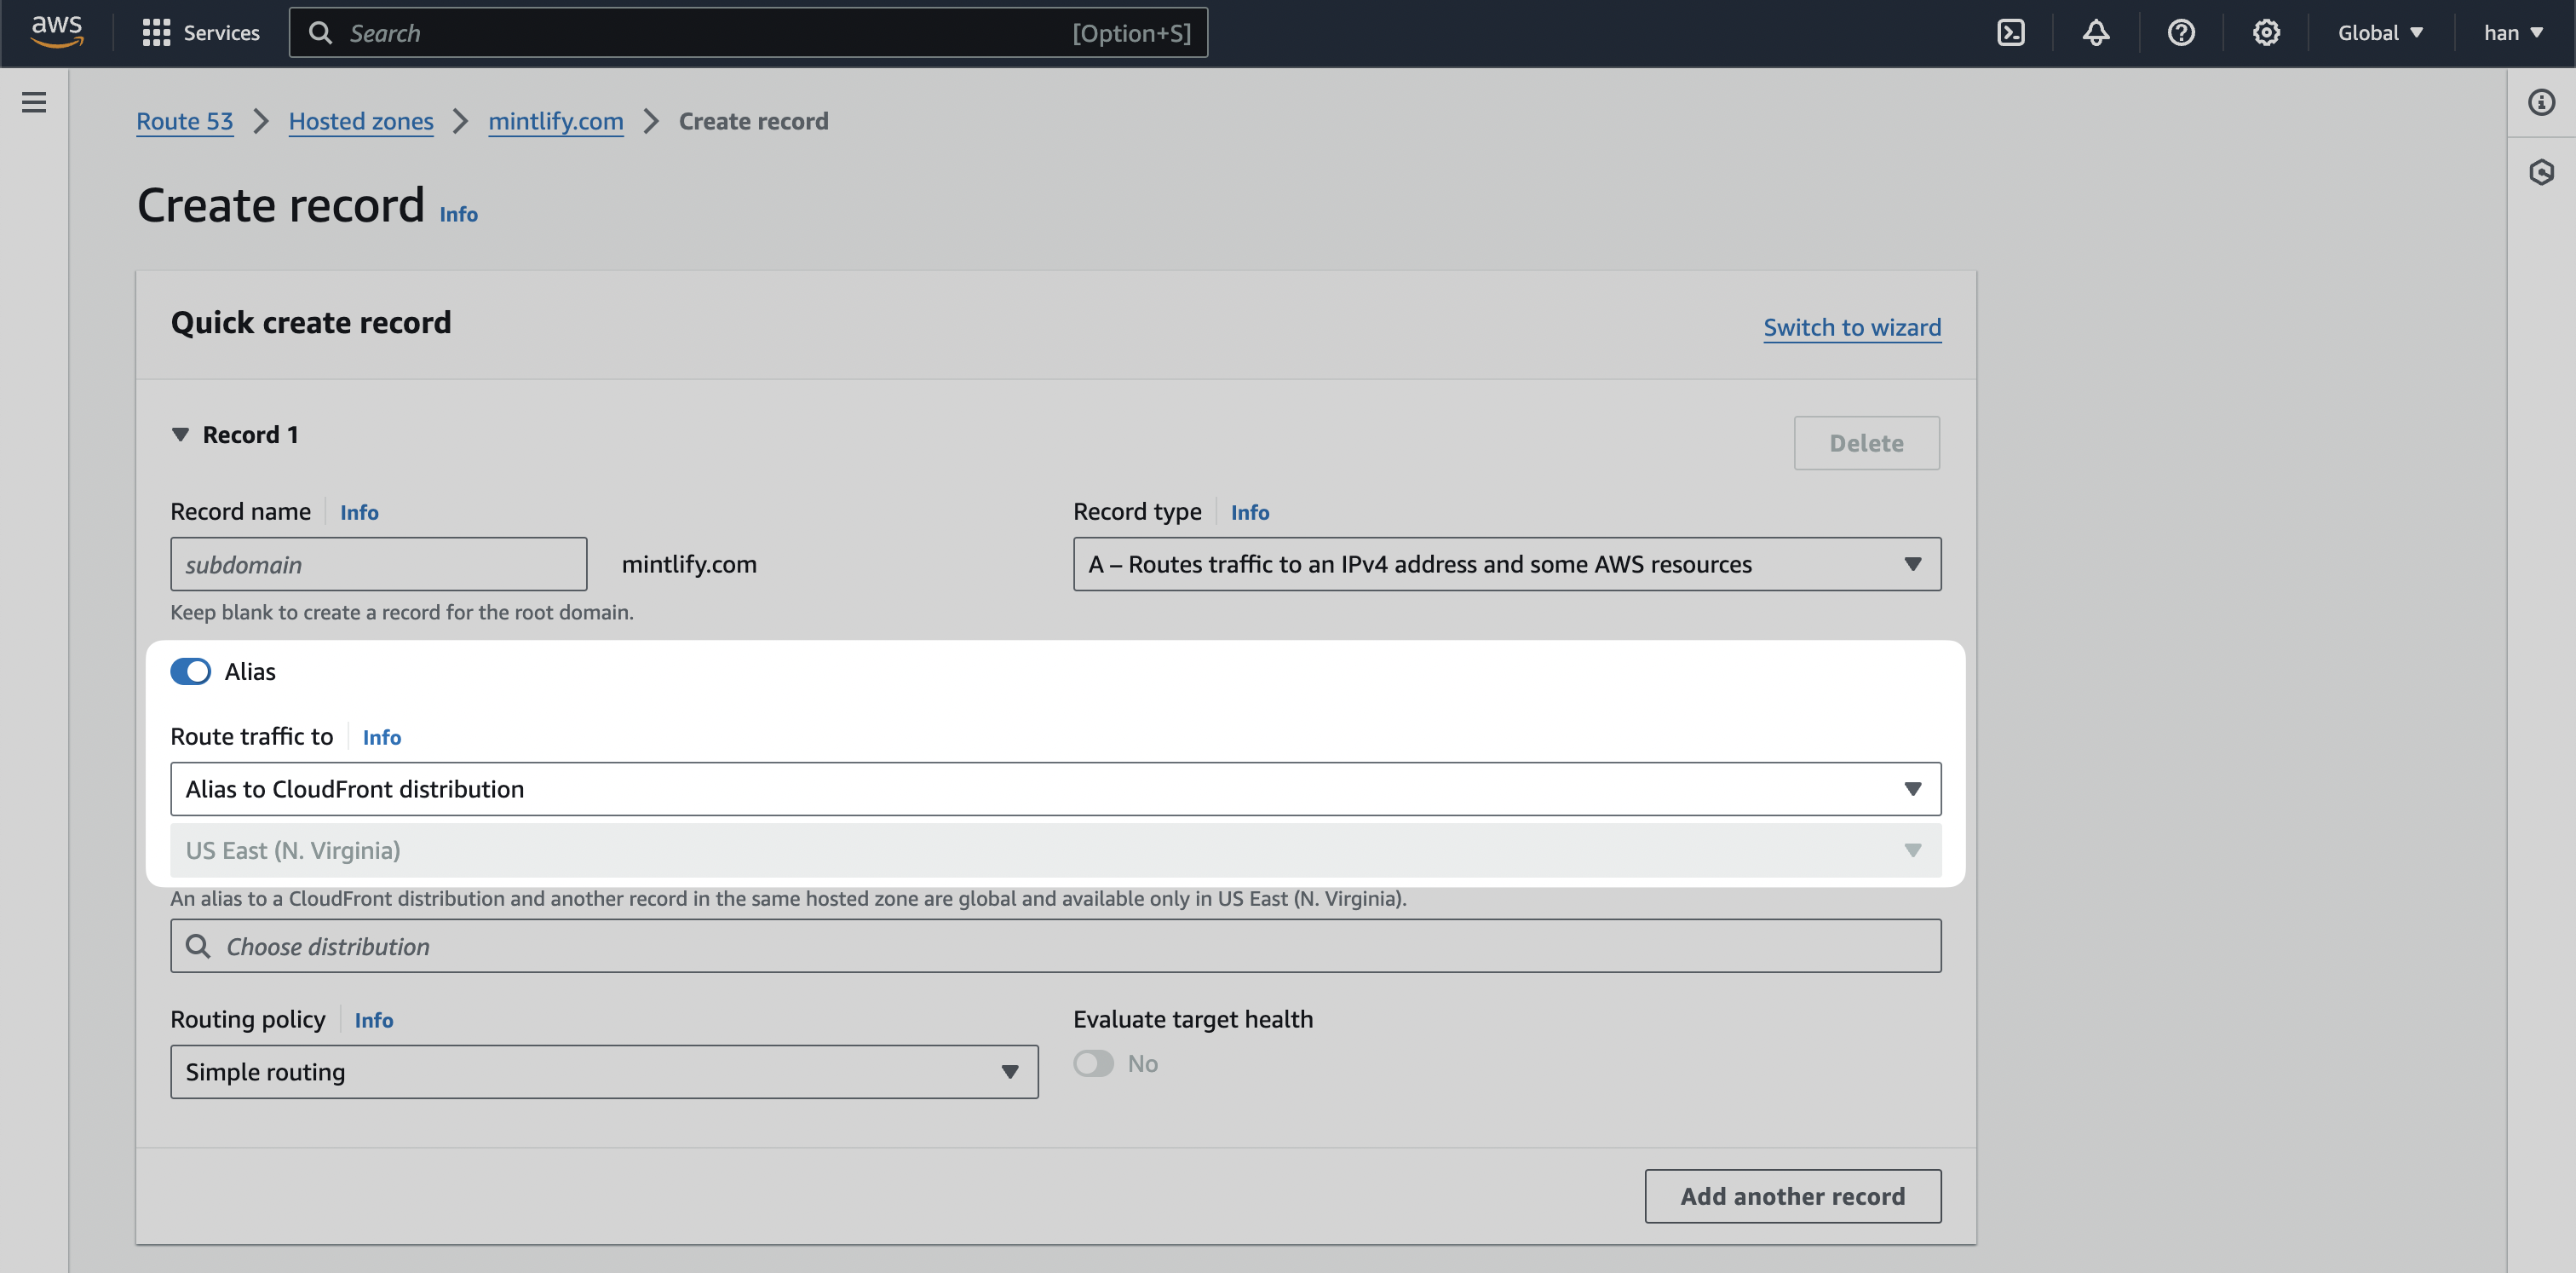
Click `Create records`.
You may need to remove the existing A record if one currently exists.
And voila! You should be able to have your documentation served at `/docs` for your primary domain.