> ## Documentation Index
> Fetch the complete documentation index at: https://mintlify-han-update-changelogs.mintlify.site/llms.txt
> Use this file to discover all available pages before exploring further.
# Cloudflare
> Host documentation at a /docs subpath using Cloudflare Workers
export const platform_0 = "Cloudflare"
**Prerequisite**: Your primary domain (company.com) is hosted on {platform_0}
and you are on the [Mintlify Pro plan or above](https://mintlify.com/pricing).
## Create Cloudflare Worker
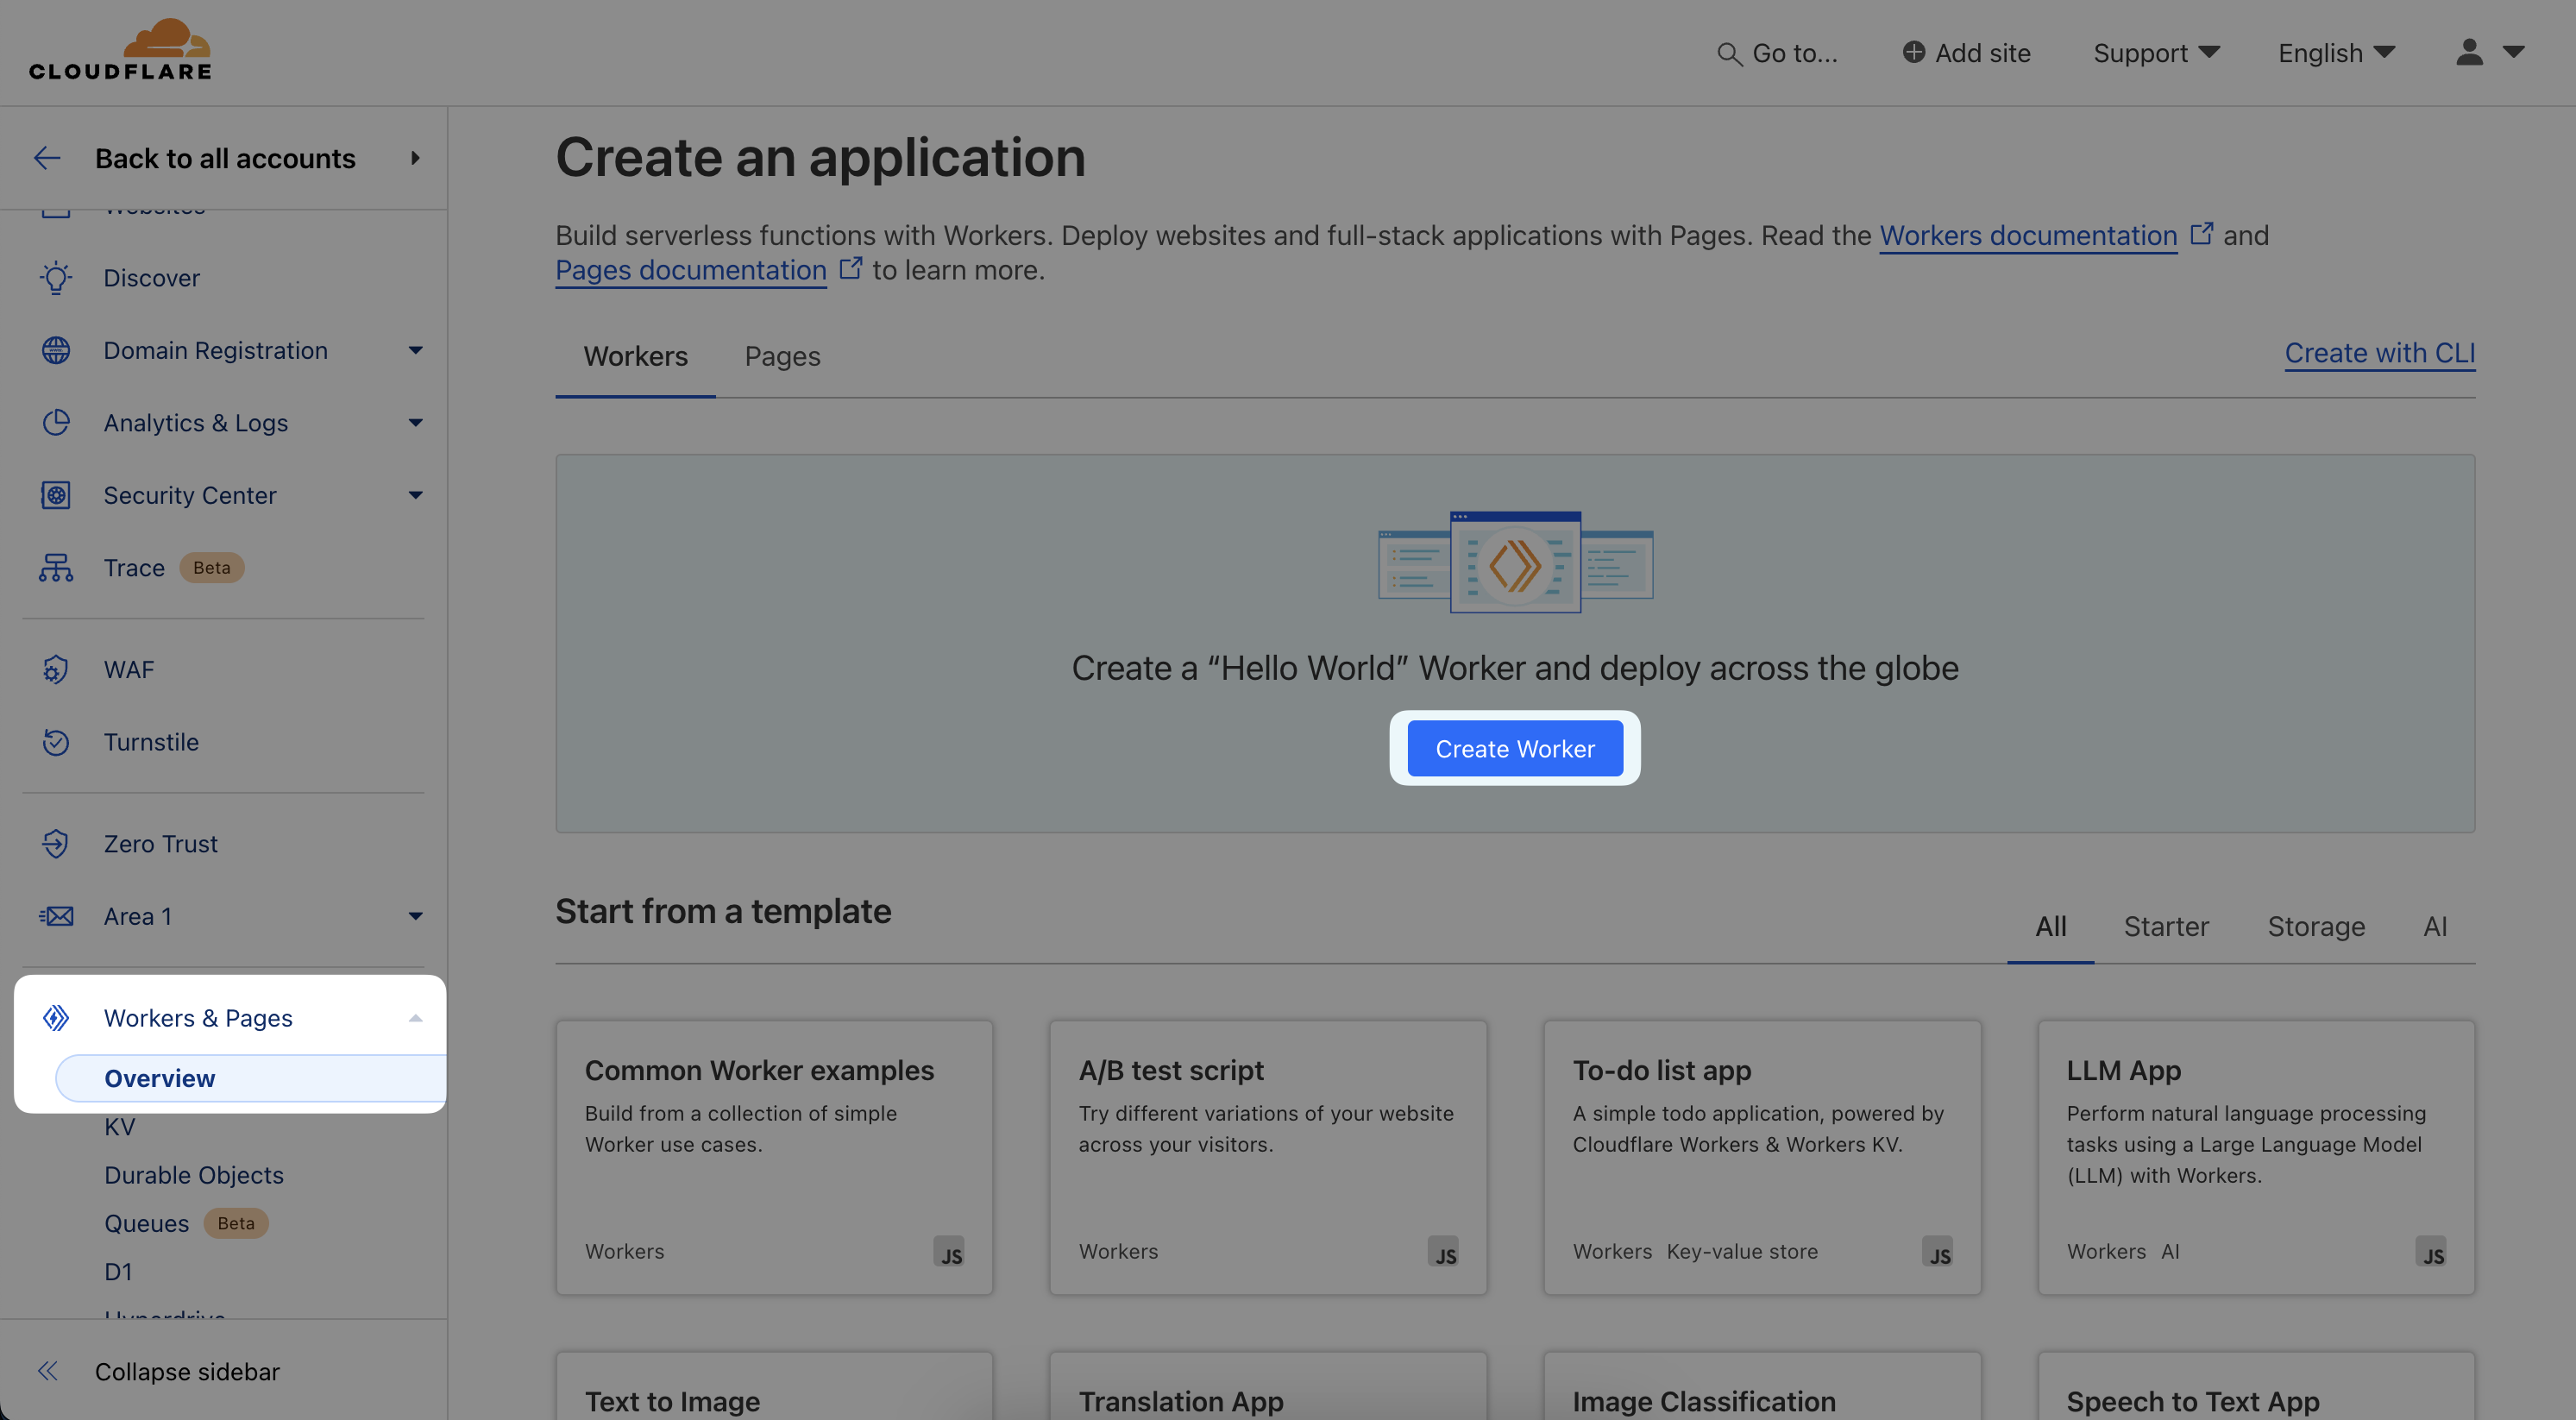
Navigate to the `Workers & Pages > Create application > Create worker`. You
should be able to presented with the following screen where you can create a new
Cloudlfare worker.
 ### Add custom domain
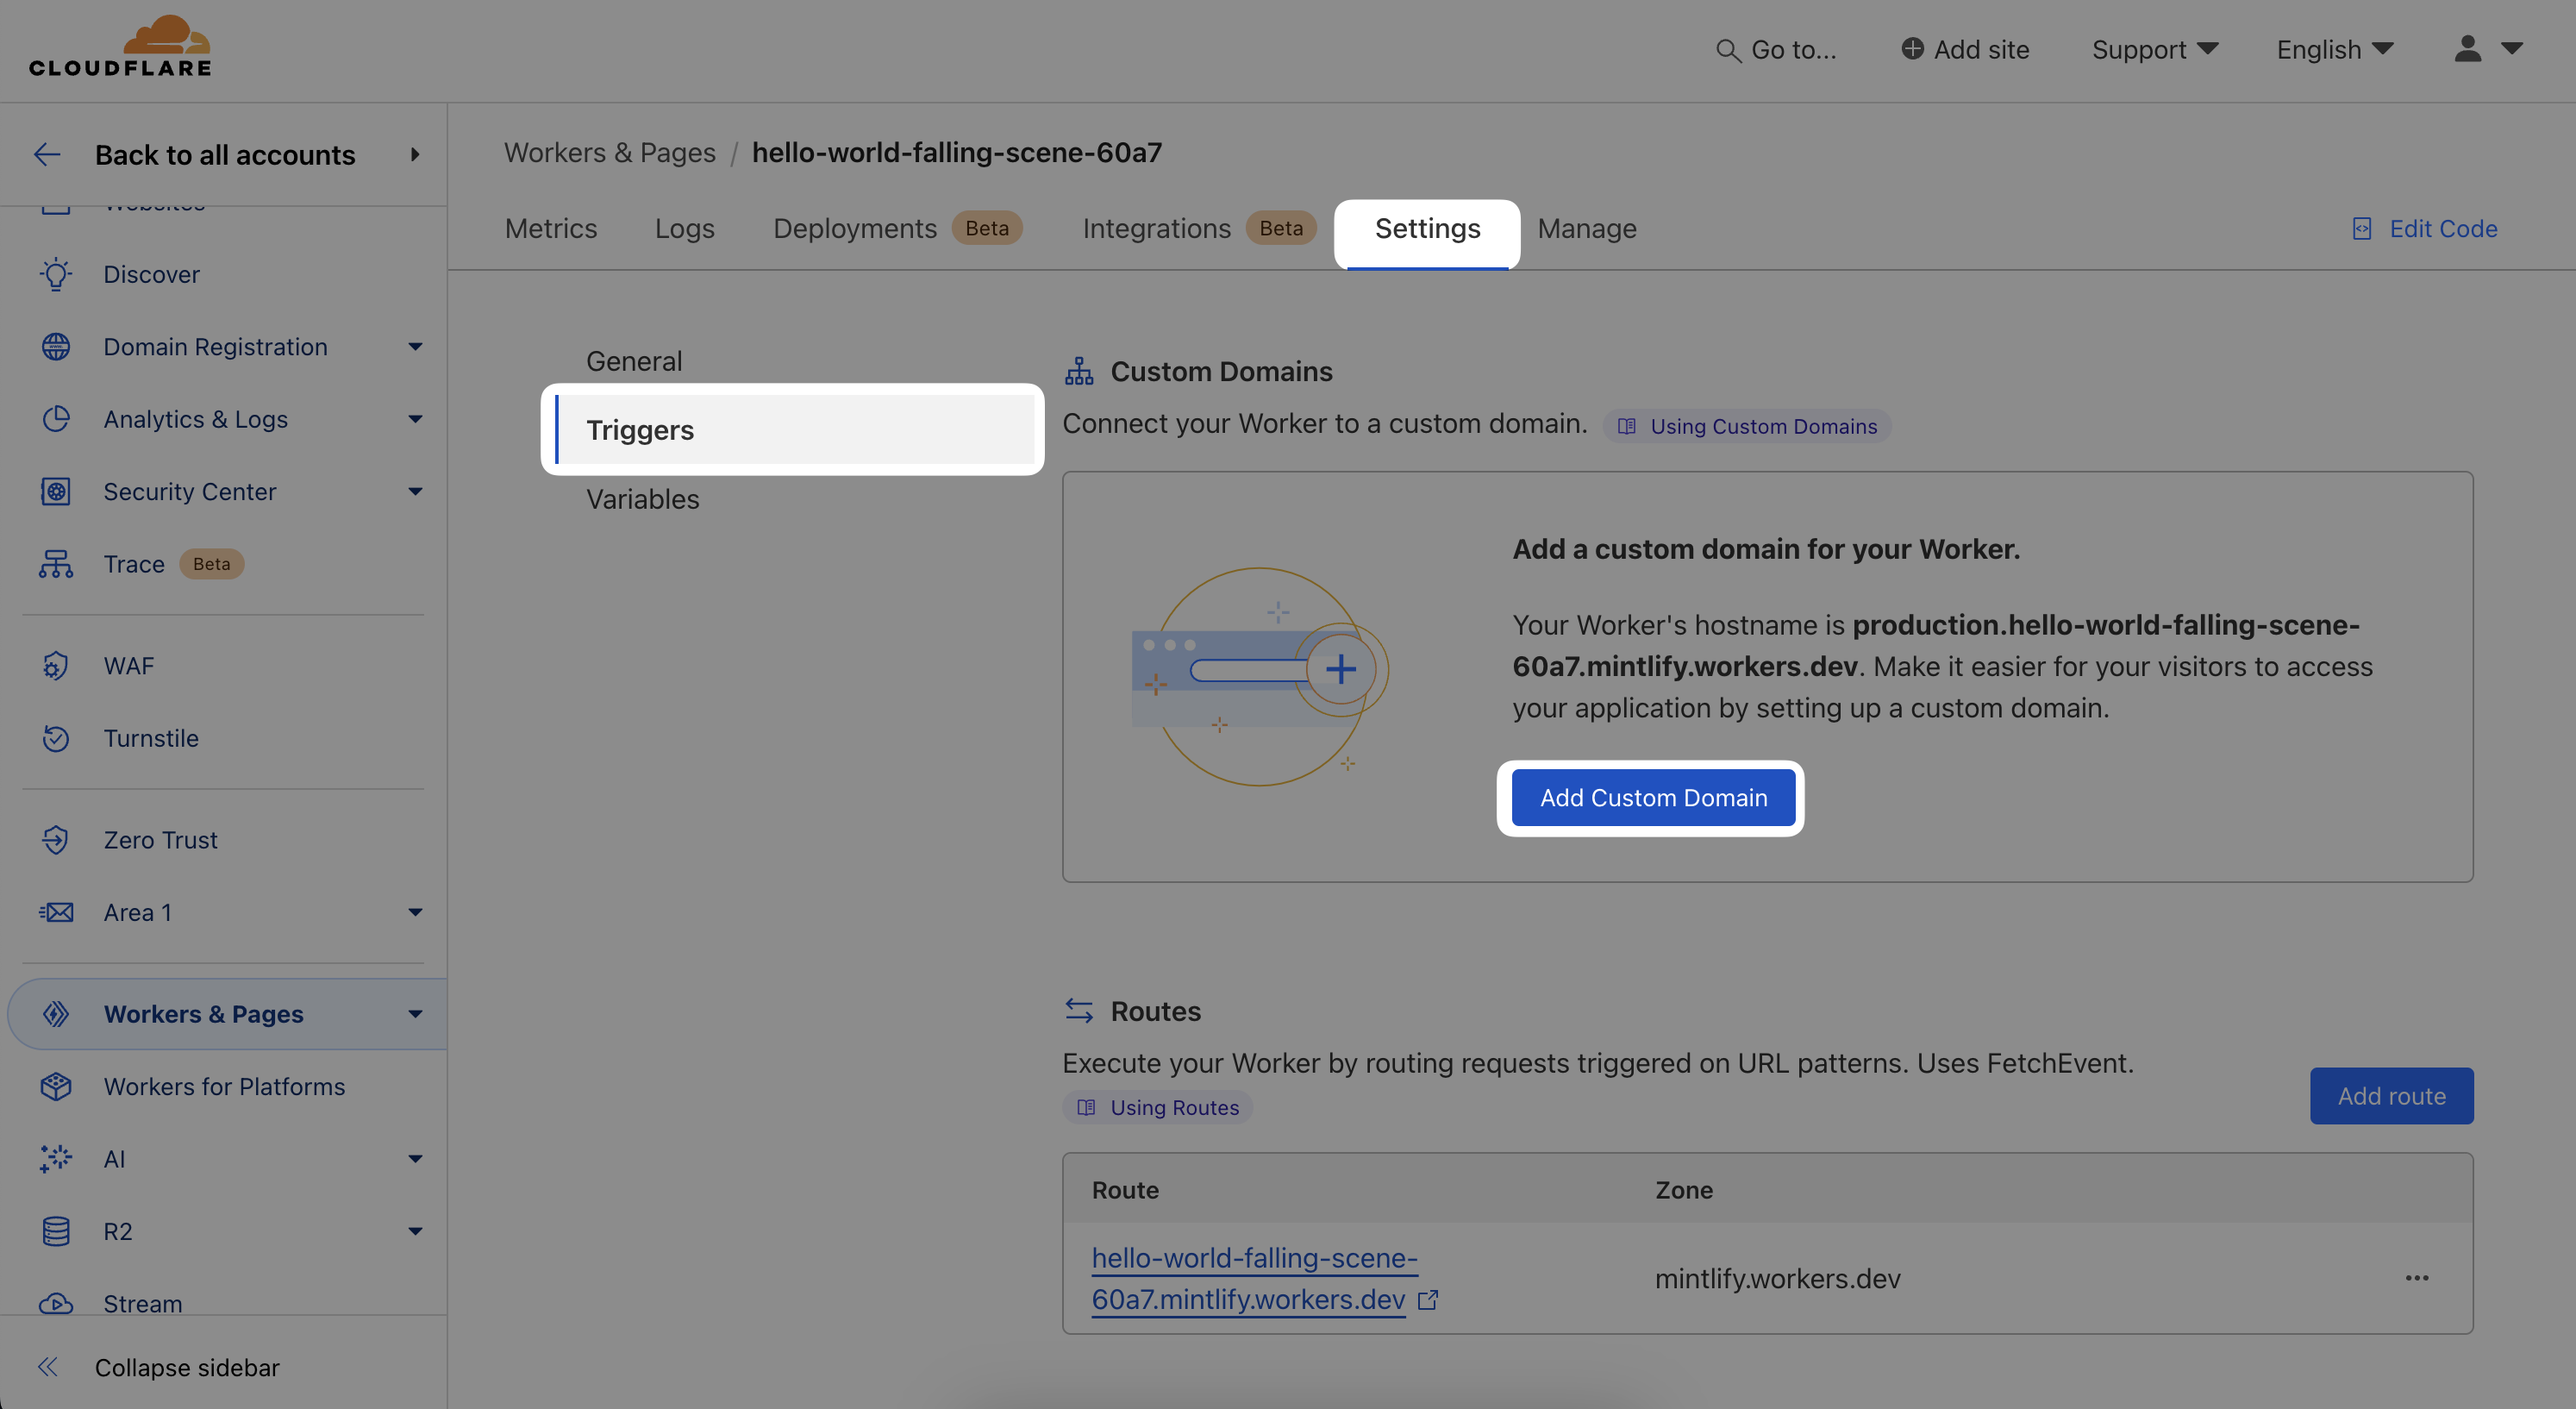
Once the worker is created, click `Configure worker`. Navigate to the worker
`Settings > Triggers`. Click on `Add Custom Domain` to add your desired domain
into the list - we recommend you add both the version with and without `www.`
prepended to the domain.
### Add custom domain
Once the worker is created, click `Configure worker`. Navigate to the worker
`Settings > Triggers`. Click on `Add Custom Domain` to add your desired domain
into the list - we recommend you add both the version with and without `www.`
prepended to the domain.
 If you have trouble setting up a custom subdirectory,
[contact our support team](mailto:sales@mintlify.com) and we'll walk you through
upgrading your hosting with us.
### Edit Worker Script
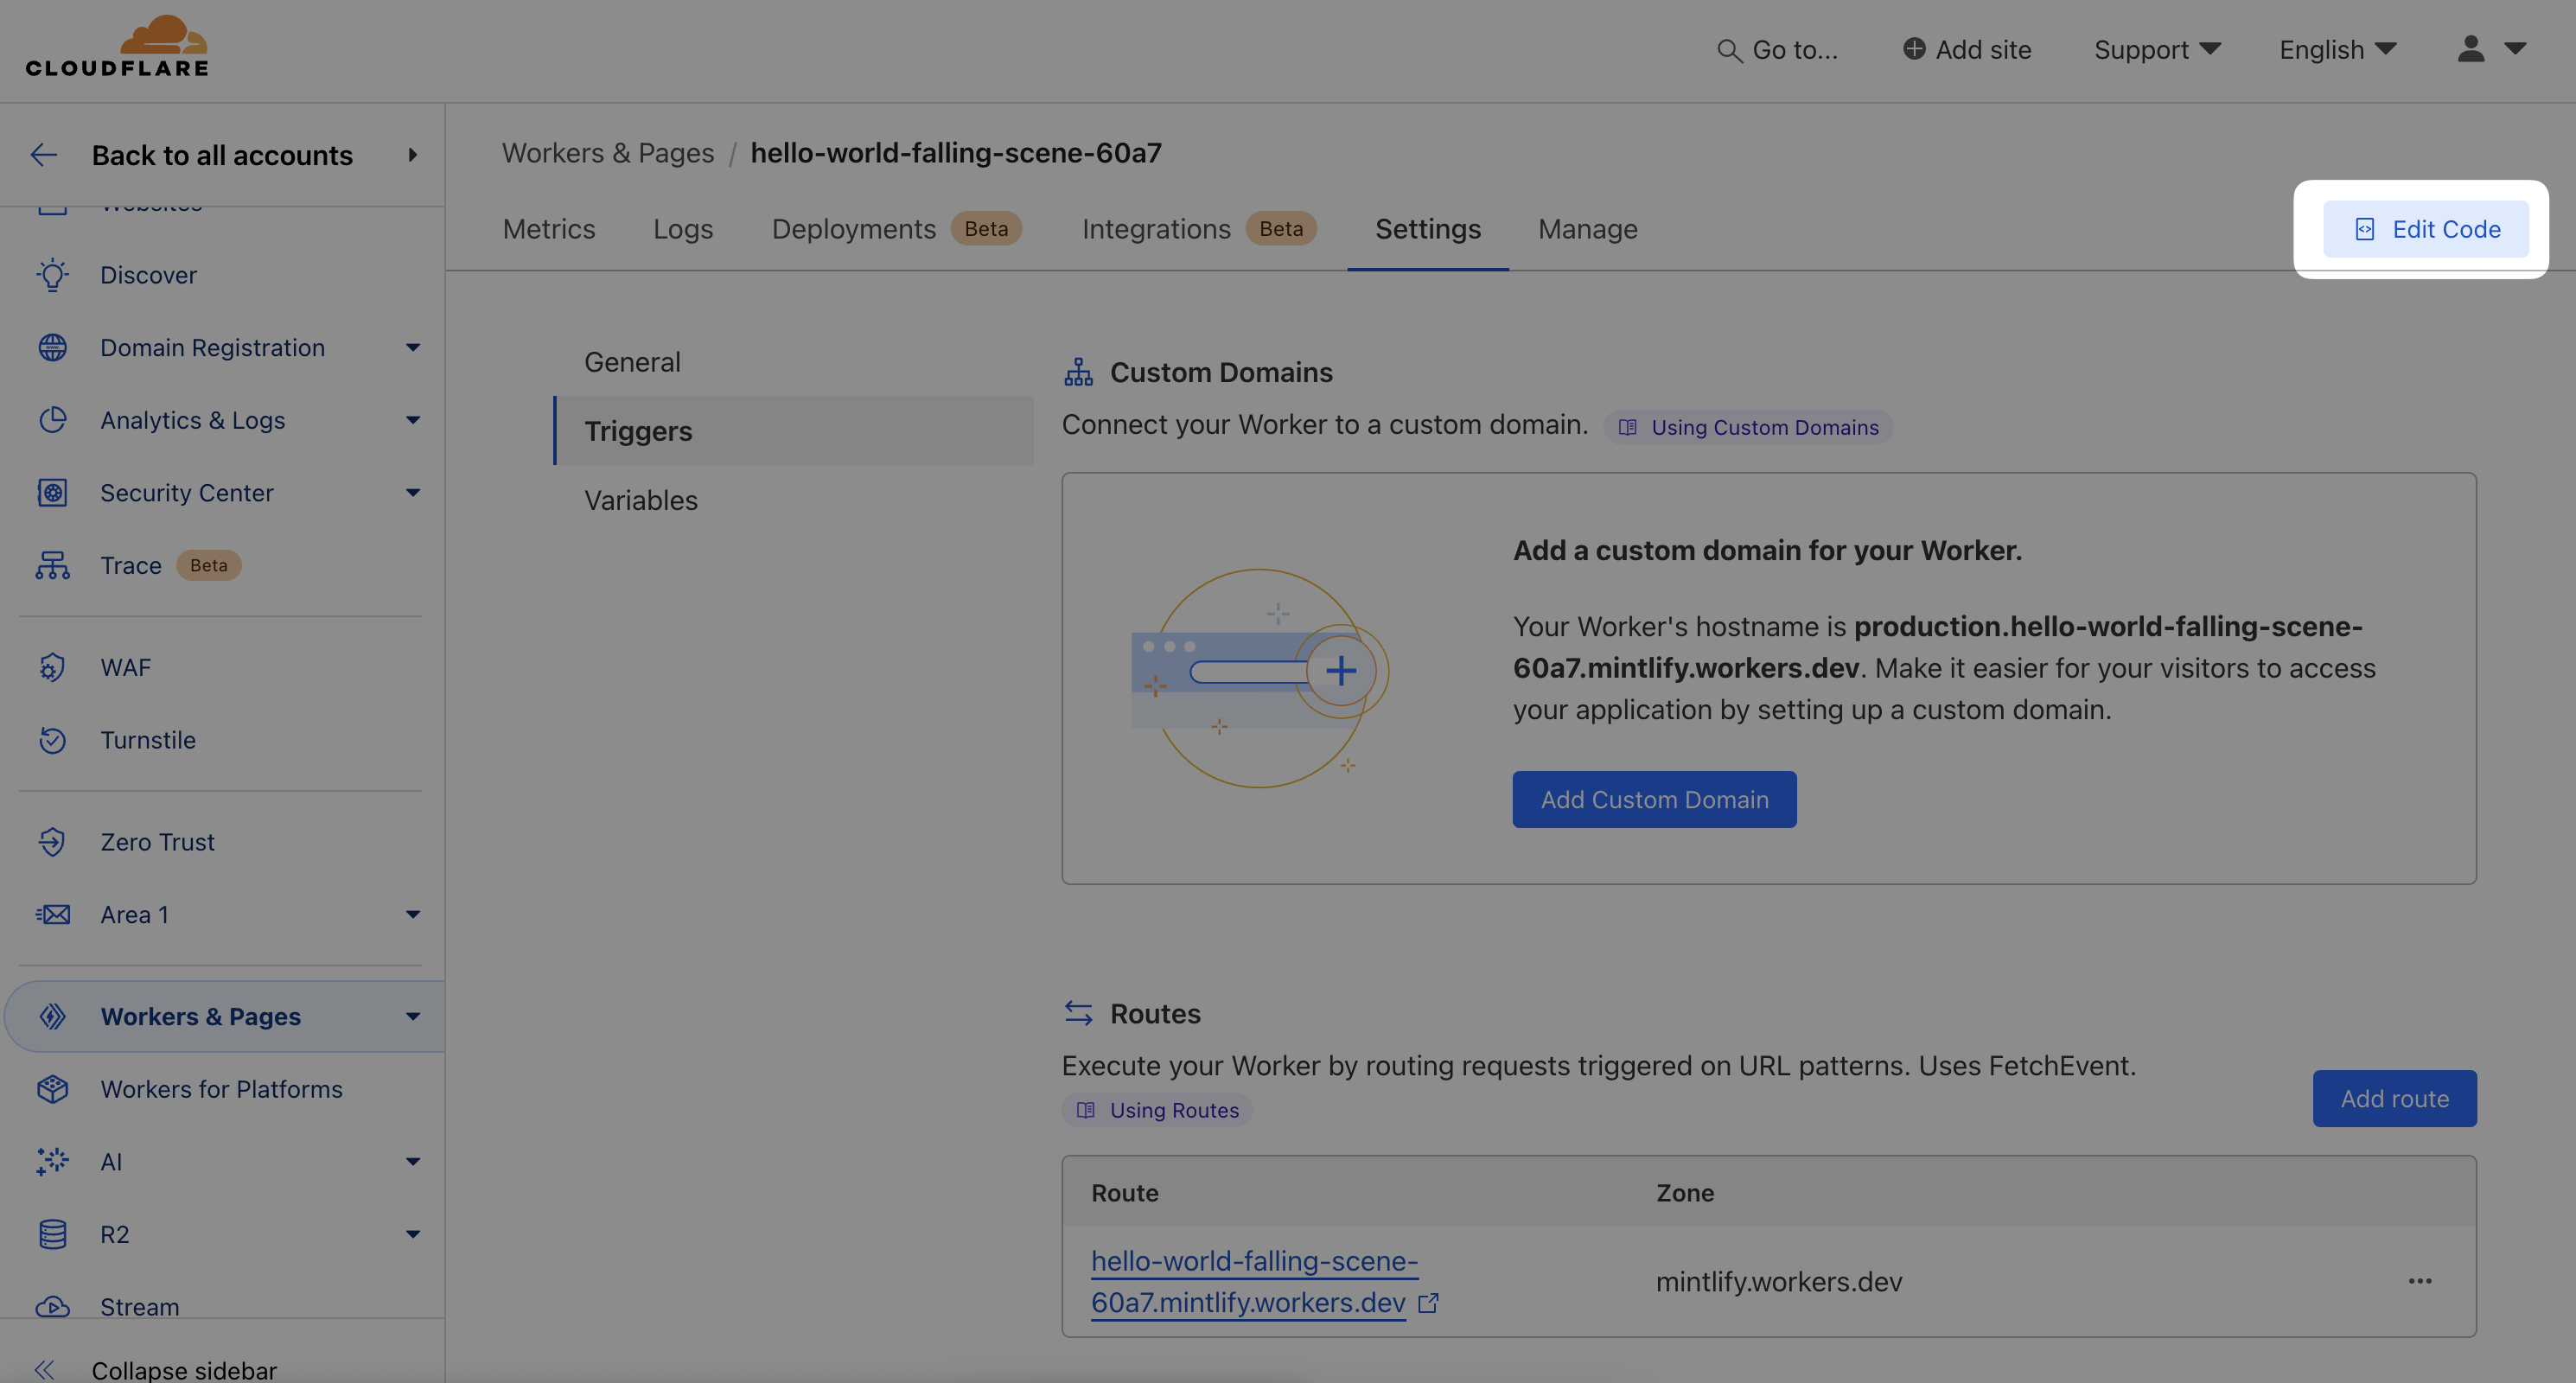
Click on `Edit Code` and add the following script into the worker's code.
If you have trouble setting up a custom subdirectory,
[contact our support team](mailto:sales@mintlify.com) and we'll walk you through
upgrading your hosting with us.
### Edit Worker Script
Click on `Edit Code` and add the following script into the worker's code.
 Edit `DOCS_URL` by replacing `[SUBDOMAIN]` with your unique subdomain and
`CUSTOM_URL` with your website's base URL.
```javascript
addEventListener("fetch", (event) => {
event.respondWith(handleRequest(event.request));
});
async function handleRequest(request) {
try {
const urlObject = new URL(request.url);
// If the request is to the docs subdirectory
if (/^\/docs/.test(urlObject.pathname)) {
// Then Proxy to Mintlify
const DOCS_URL = "[SUBDOMAIN].mintlify.dev";
const CUSTOM_URL = "[YOUR_DOMAIN]";
let url = new URL(request.url);
url.hostname = DOCS_URL;
let proxyRequest = new Request(url, request);
proxyRequest.headers.set("Host", DOCS_URL);
proxyRequest.headers.set("X-Forwarded-Host", CUSTOM_URL);
proxyRequest.headers.set("X-Forwarded-Proto", "https");
return await fetch(proxyRequest);
}
} catch (error) {
// if no action found, play the regular request
return await fetch(request);
}
return await fetch(request);
}
```
Click on `Deploy` and wait for the changes to propagate (it can take up to a few
hours).
## Reach out to Mintlify team
Once completing the Cloudflare setup, the Mintlify team will setup the
subdirectory settings in your deployment. Reach out over
[email](mailto:sales@mintlify.com).
Edit `DOCS_URL` by replacing `[SUBDOMAIN]` with your unique subdomain and
`CUSTOM_URL` with your website's base URL.
```javascript
addEventListener("fetch", (event) => {
event.respondWith(handleRequest(event.request));
});
async function handleRequest(request) {
try {
const urlObject = new URL(request.url);
// If the request is to the docs subdirectory
if (/^\/docs/.test(urlObject.pathname)) {
// Then Proxy to Mintlify
const DOCS_URL = "[SUBDOMAIN].mintlify.dev";
const CUSTOM_URL = "[YOUR_DOMAIN]";
let url = new URL(request.url);
url.hostname = DOCS_URL;
let proxyRequest = new Request(url, request);
proxyRequest.headers.set("Host", DOCS_URL);
proxyRequest.headers.set("X-Forwarded-Host", CUSTOM_URL);
proxyRequest.headers.set("X-Forwarded-Proto", "https");
return await fetch(proxyRequest);
}
} catch (error) {
// if no action found, play the regular request
return await fetch(request);
}
return await fetch(request);
}
```
Click on `Deploy` and wait for the changes to propagate (it can take up to a few
hours).
## Reach out to Mintlify team
Once completing the Cloudflare setup, the Mintlify team will setup the
subdirectory settings in your deployment. Reach out over
[email](mailto:sales@mintlify.com).